
Announcement Repository Quick Guide
Summary: This document explains how to upload audio announcements, greetings, etc. for application in Auto Attendants, Music on Hold and other group features/services
Download article(s)
![]() Announcement Repository Quick Guide.pdf
Announcement Repository Quick Guide.pdf
Announcement Repository Quick Guide
Announcement Repository Quick Guide
Announcement Repository Quick Guide
12/07/21
1 of 4
The Announcement Repository allows you to upload and save multiple announcements or greetings that can then be
selected and applied to the services and features that use them including Auto Attendants and Music on Hold. There is
an Announcement Repository on both the group admin and end user level.
Note: For information regarding accessing and navigating the VoIP Portal, please refer to Managing Your Hosted
PBX Services.
There are two primary methods for adding an audio file to the Announcement Repository:
•
Record the greeting directly into the Announcement Repository.
•
Record the greeting outside of the VoIP Portal and then upload it to the Announcement Repository.
Record the Greeting Directly into the Announcement Repository
Note: You’ll need to connect a microphone to the computer from which you are accessing the portal. Also, you may find
it helpful to script out your custom greeting(s) prior to recording them. If recording an announcement for an Auto
Attendant, make sure the options on the greeting exactly match what is programmed in the Auto Attendant menu.
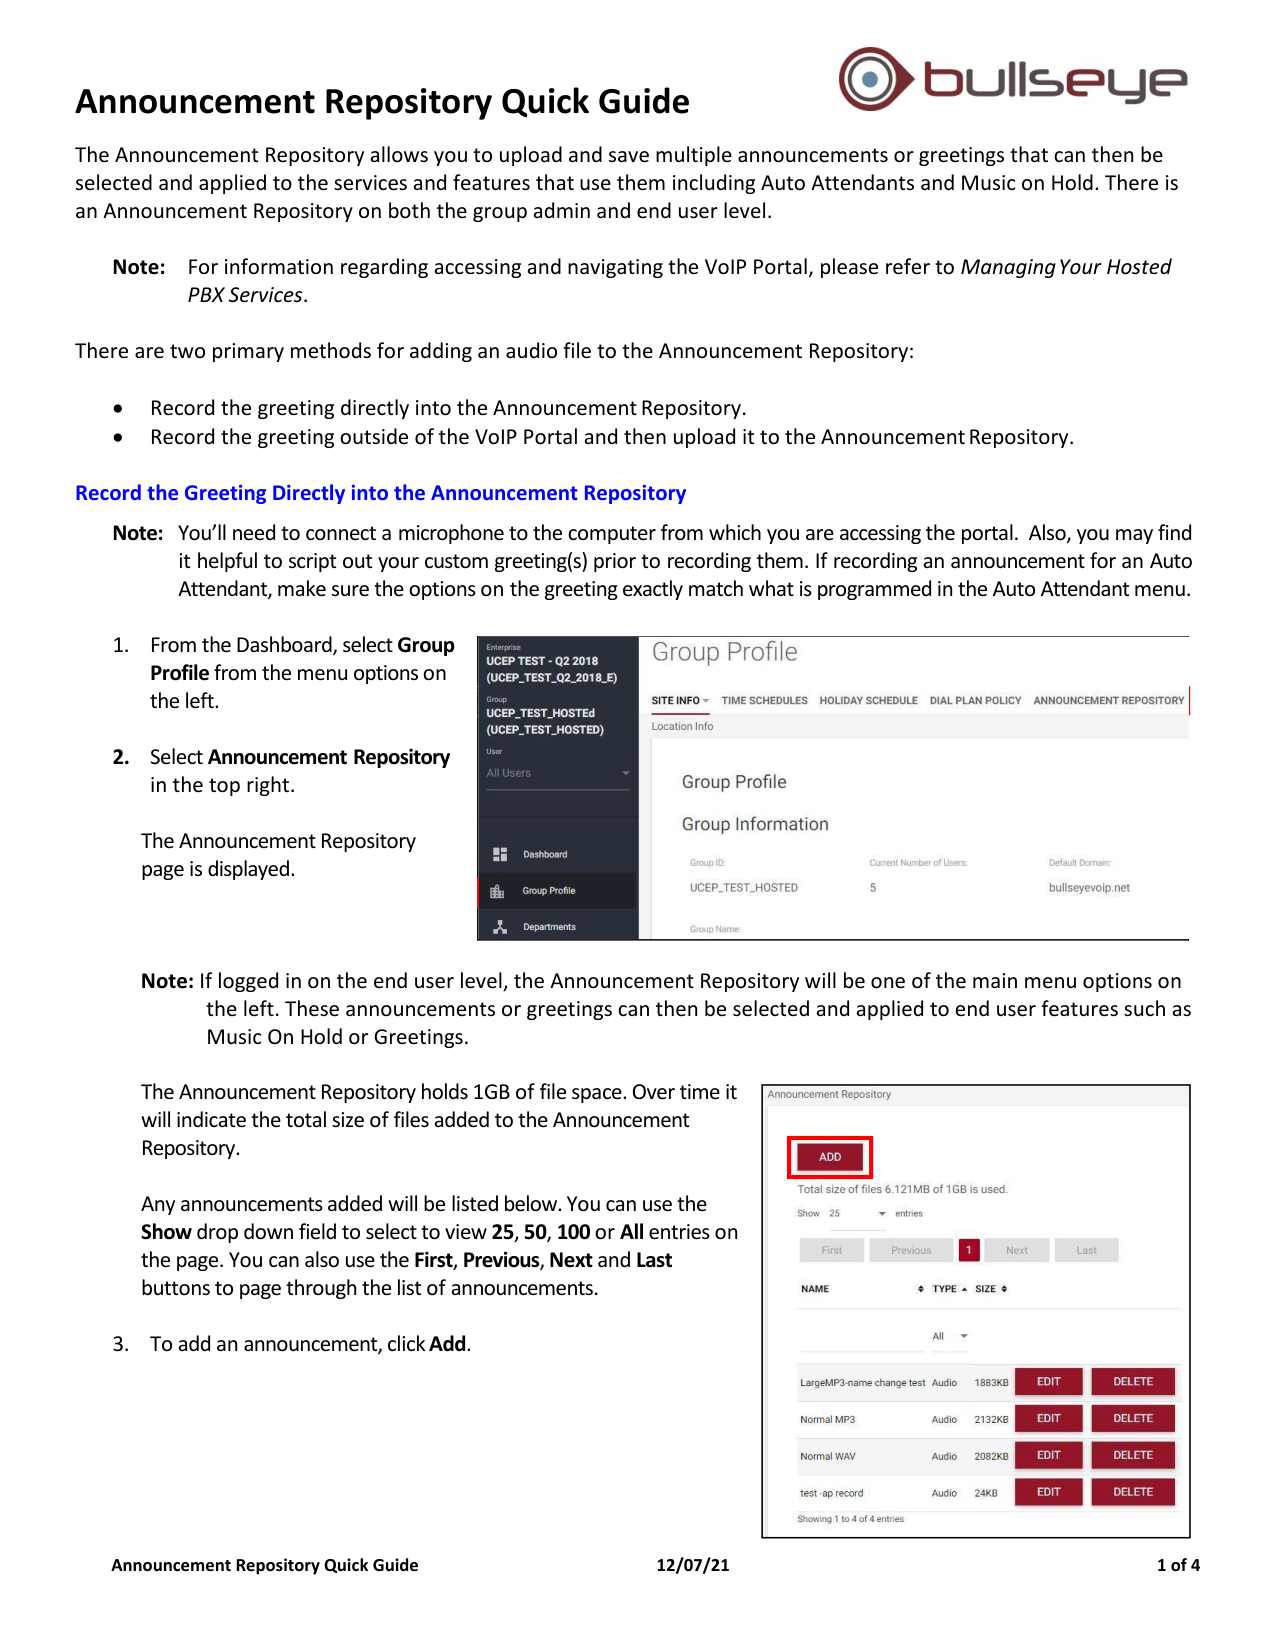
1. From the Dashboard, select Group
Profile from the menu options on
the left.
2. Select Announcement Repository
in the top right.
The Announcement Repository
page is displayed.
Note: If logged in on the end user level, the Announcement Repository will be one of the main menu options on
the left. These announcements or greetings can then be selected and applied to end user features such as
Music On Hold or Greetings.
The Announcement Repository holds 1GB of file space. Over time it
will indicate the total size of files added to the Announcement
Repository.
Any announcements added will be listed below. You can use the
Show drop down field to select to view 25, 50, 100 or All entries on
the page. You can also use the First, Previous, Next and Last
buttons to page through the list of announcements.
3. To add an announcement, click Add.
Announcement Repository Quick Guide
Announcement Repository Quick Guide
12/07/21
2 of 4
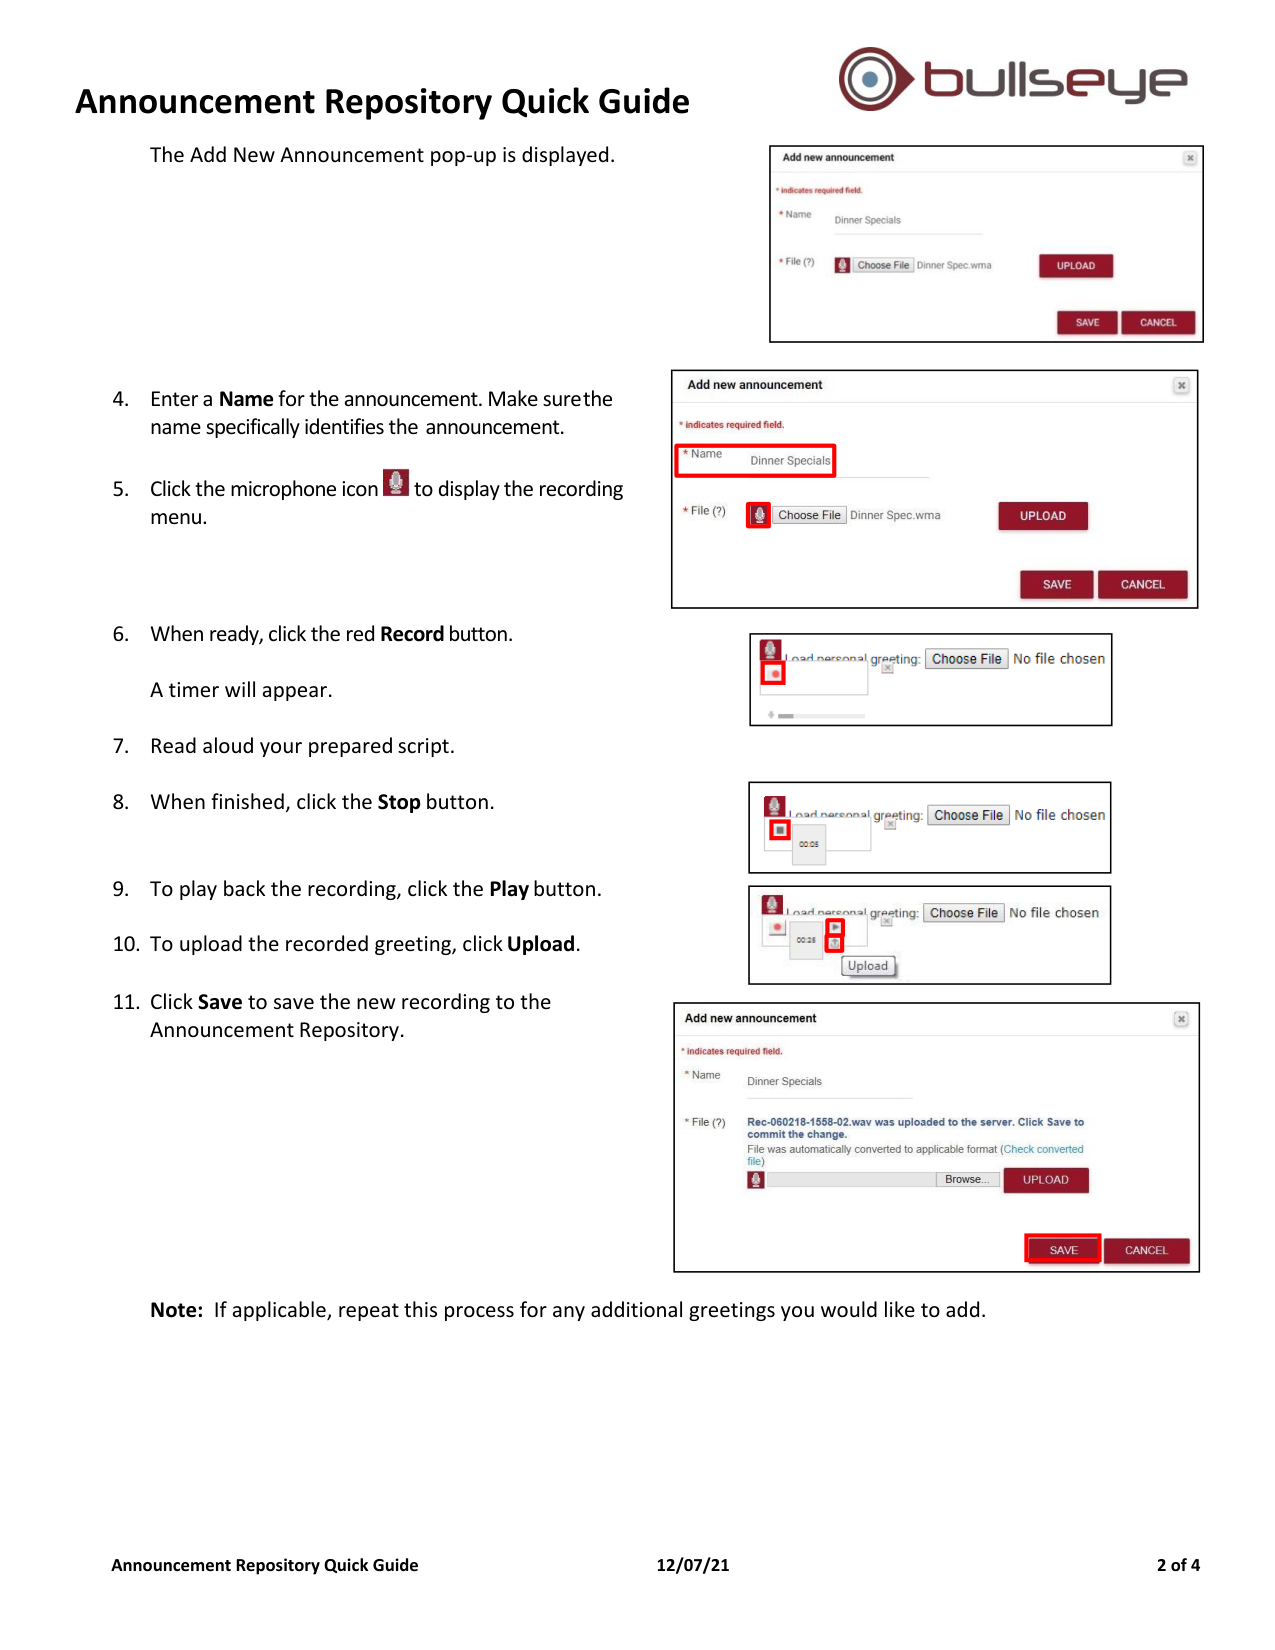
The Add New Announcement pop-up is displayed.
4. Enter a Name for the announcement. Make sure the
name specifically identifies the announcement.
5. Click the microphone icon
to display the recording
menu.
6. When ready, click the red Record button.
A timer will appear.
7. Read aloud your prepared script.
8. When finished, click the Stop button.
9. To play back the recording, click the Play button.
10. To upload the recorded greeting, click Upload.
11. Click Save to save the new recording to the
Announcement Repository.
Note: If applicable, repeat this process for any additional greetings you would like to add.
Announcement Repository Quick Guide
Announcement Repository Quick Guide
12/07/21
3 of 4
Record the Greeting outside the VoIP Portal and upload it to the Announcement Repository
Note: You’ll need to connect a microphone to the computer. Also, you may find it very helpful to script out your custom
greeting(s) prior to recording them.
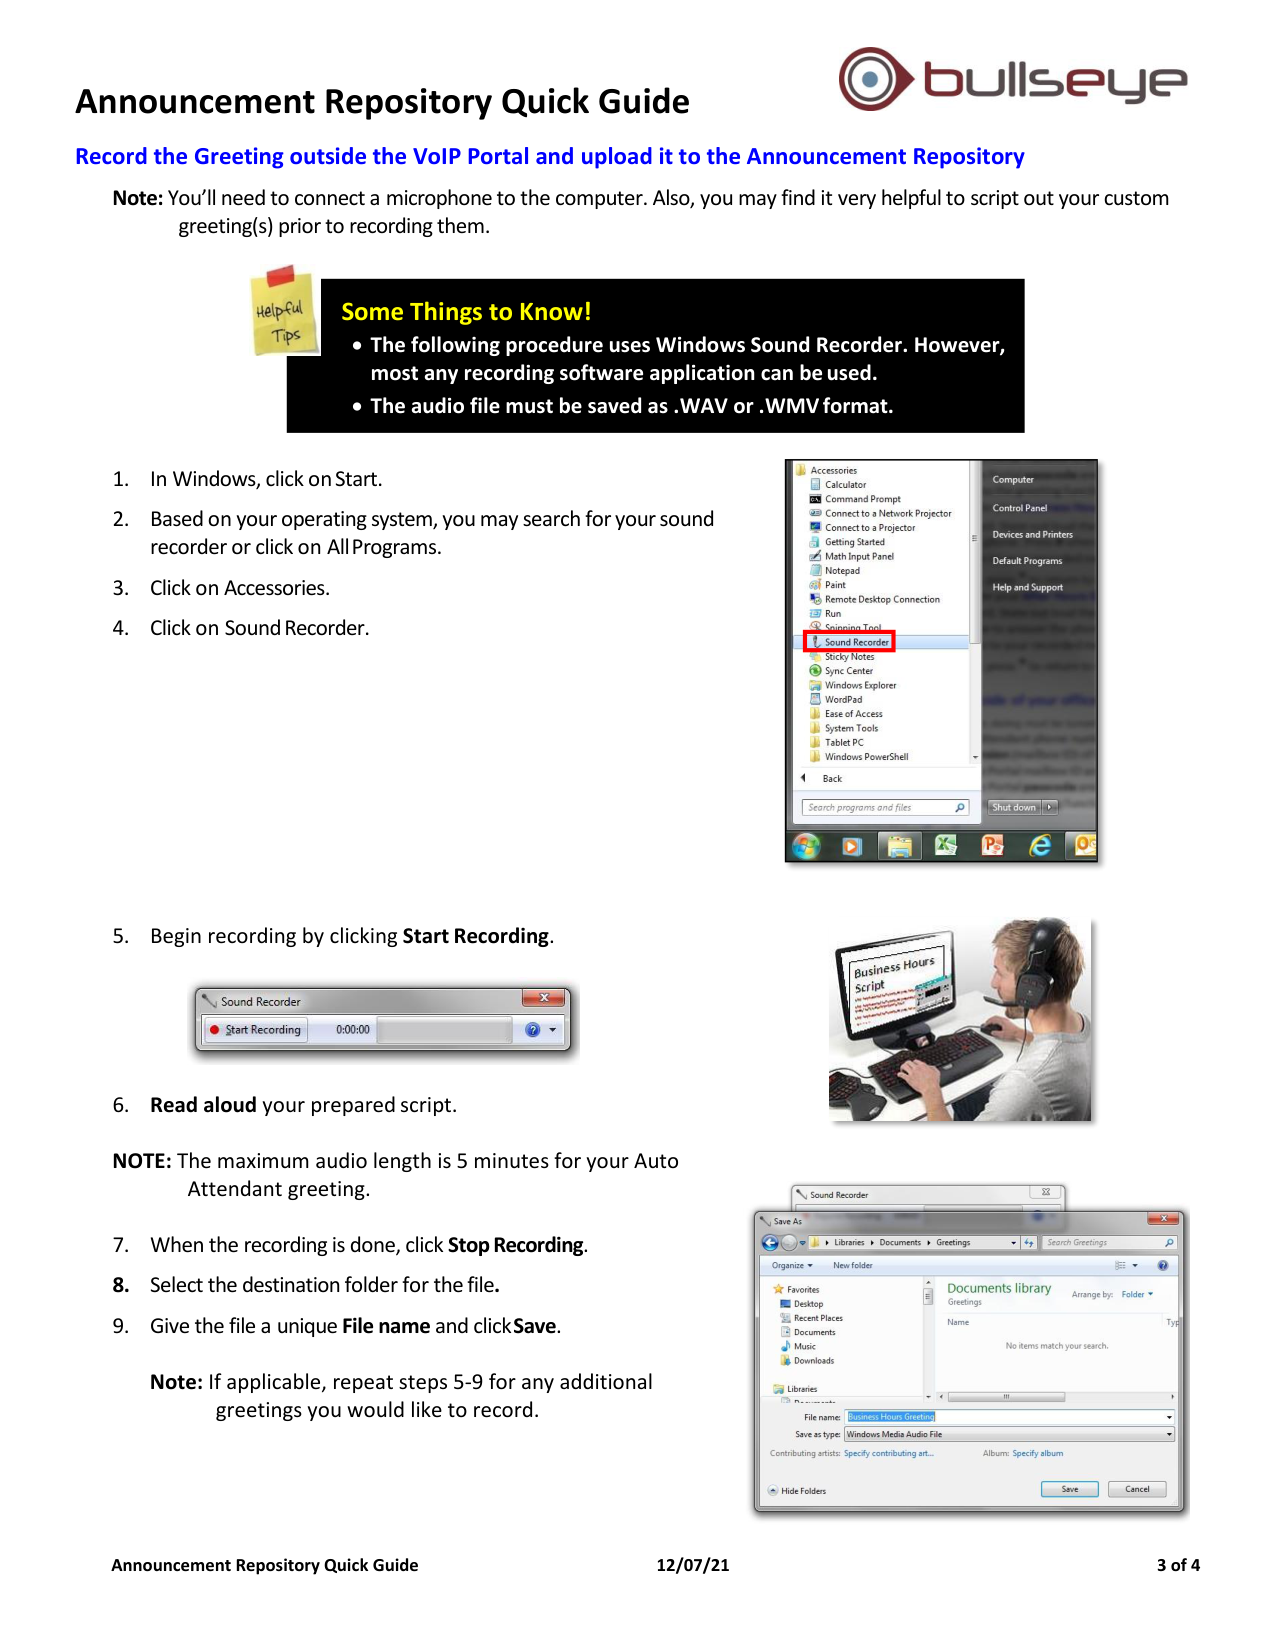
1. In Windows, click on Start.
2. Based on your operating system, you may search for your sound
recorder or click on All Programs.
3. Click on Accessories.
4. Click on Sound Recorder.
5. Begin recording by clicking Start Recording.
6. Read aloud your prepared script.
NOTE: The maximum audio length is 5 minutes for your Auto
Attendant greeting.
7. When the recording is done, click Stop Recording.
8. Select the destination folder for the file.
9. Give the file a unique File name and click Save.
Note: If applicable, repeat steps 5-9 for any additional
greetings you would like to record.
Some Things to Know!
The following procedure uses Windows Sound Recorder. However,
most any recording software application can be used.
The audio file must be saved as .WAV or .WMV format.
Announcement Repository Quick Guide
Announcement Repository Quick Guide
12/07/21
4 of 4
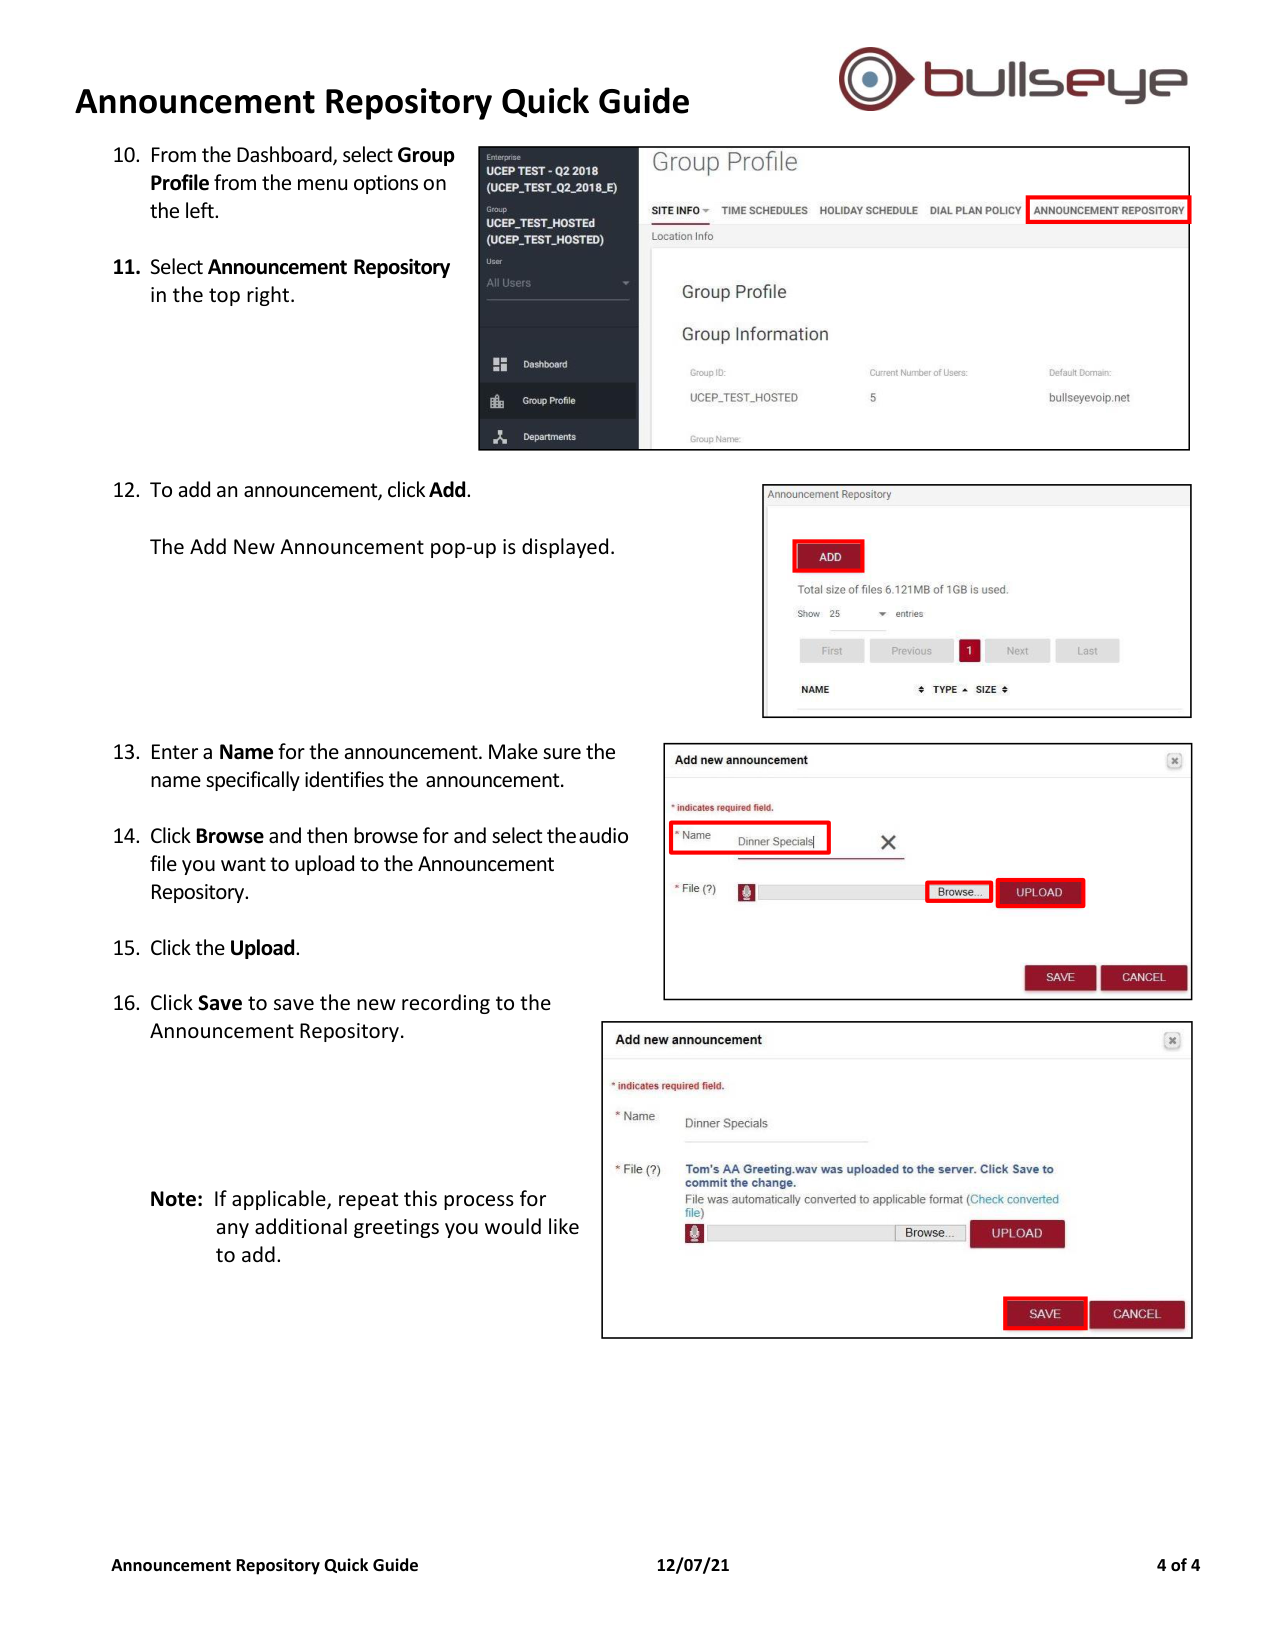
10. From the Dashboard, select Group
Profile from the menu options on
the left.
11. Select Announcement Repository
in the top right.
12. To add an announcement, click Add.
The Add New Announcement pop-up is displayed.
13. Enter a Name for the announcement. Make sure the
name specifically identifies the announcement.
14. Click Browse and then browse for and select the audio
file you want to upload to the Announcement
Repository.
15. Click the Upload.
16. Click Save to save the new recording to the
Announcement Repository.
Note: If applicable, repeat this process for
any additional greetings you would like
to add.