
How to Set-up a Hunt Group
Summary: Hunt Groups allow multiple handsets to ring simultaneously or in sequence when an incoming call is received. This document explains how to set-up a Hunt Group within the VoIP Portal.
Download article(s)
![]() How to Set-up a Hunt Group.pdf
How to Set-up a Hunt Group.pdf
How to Set-up a Hunt Group
Setting Up a Hunt Group
Setting Up a Hunt Group
12/20/2021
1
Hunt Groups automatically process incoming calls received by a single phone number by distributing
them among a group of users or agents. Hunt Groups are maintained at the Group level.
Note: For information regarding accessing and navigating the VoIP Portal, please refer to
Managing Your Hosted PBX Services.
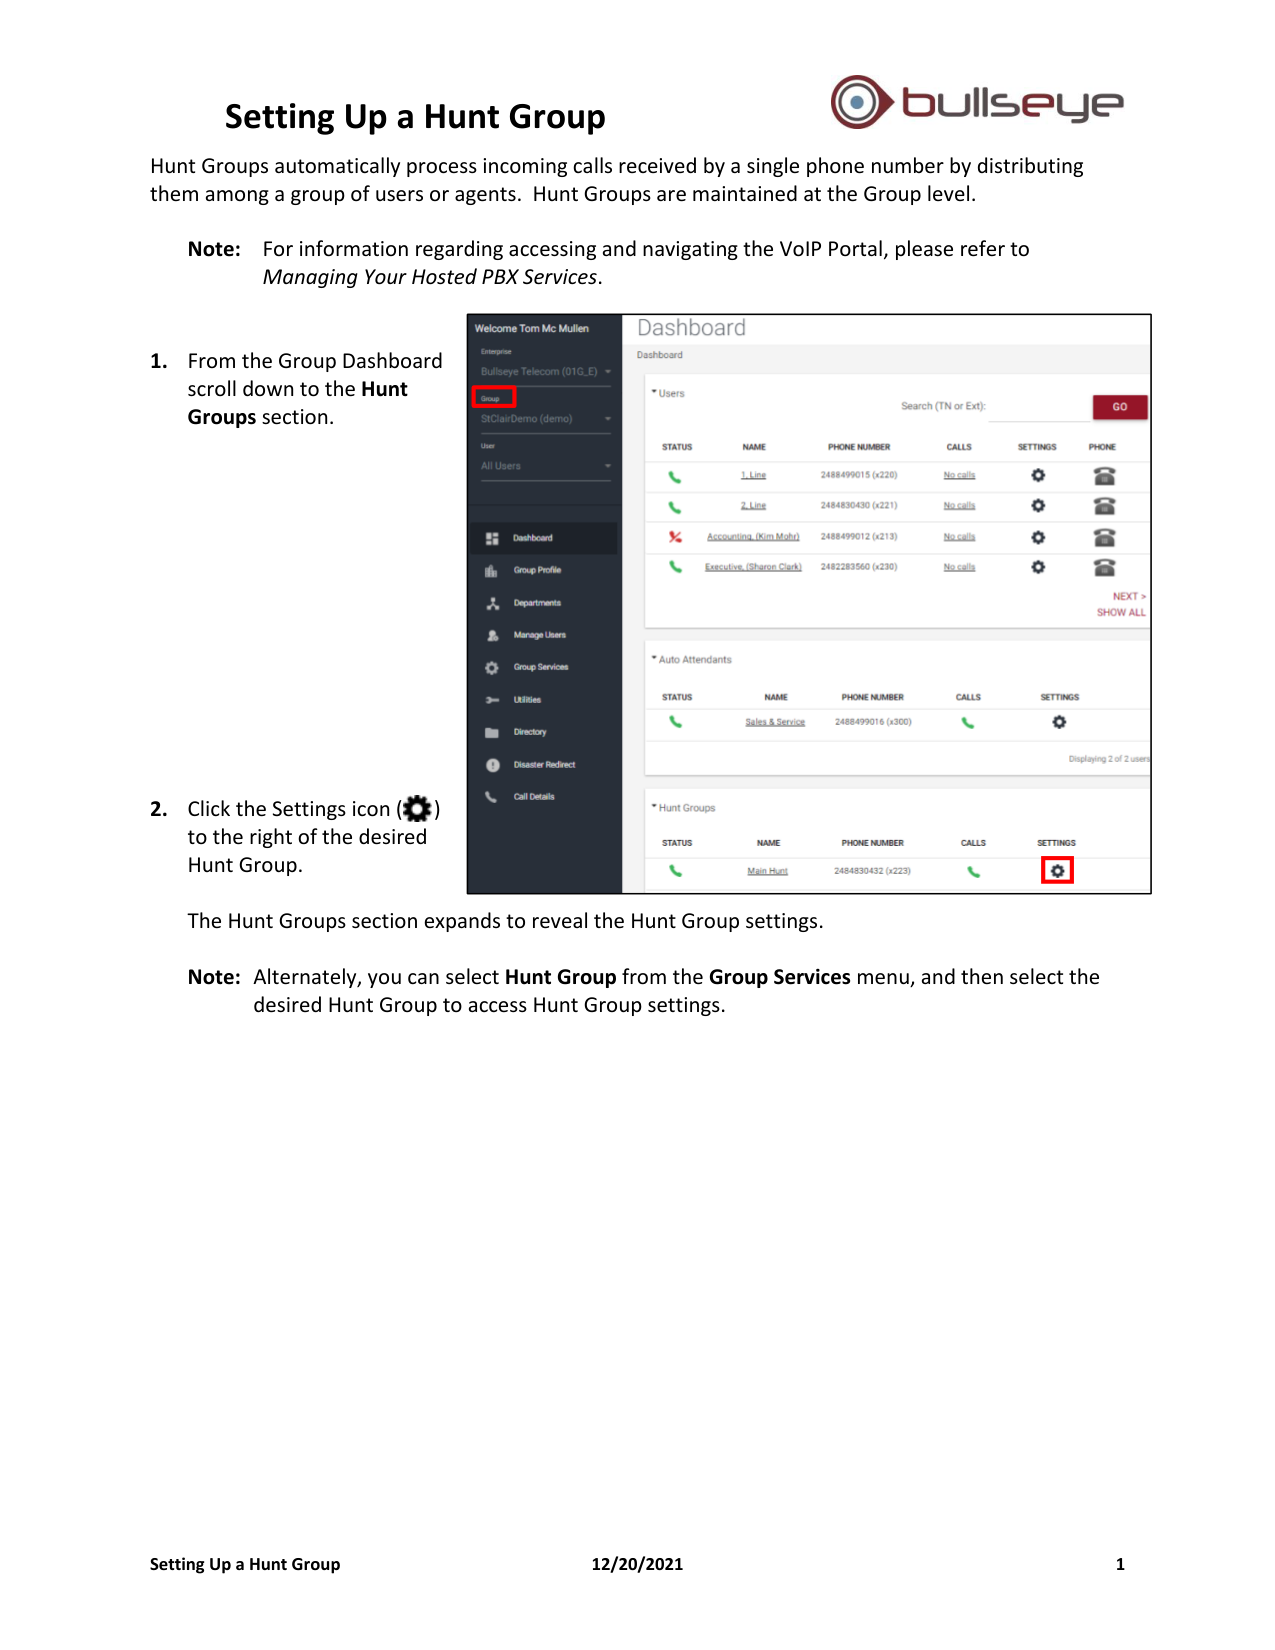
1. From the Group Dashboard
scroll down to the Hunt
Groups section.
2. Click the Settings icon ( )
to the right of the desired
Hunt Group.
The Hunt Groups section expands to reveal the Hunt Group settings.
Note: Alternately, you can select Hunt Group from the Group Services menu, and then select the
desired Hunt Group to access Hunt Group settings.
Setting Up a Hunt Group
Setting Up a Hunt Group
12/20/2021
2
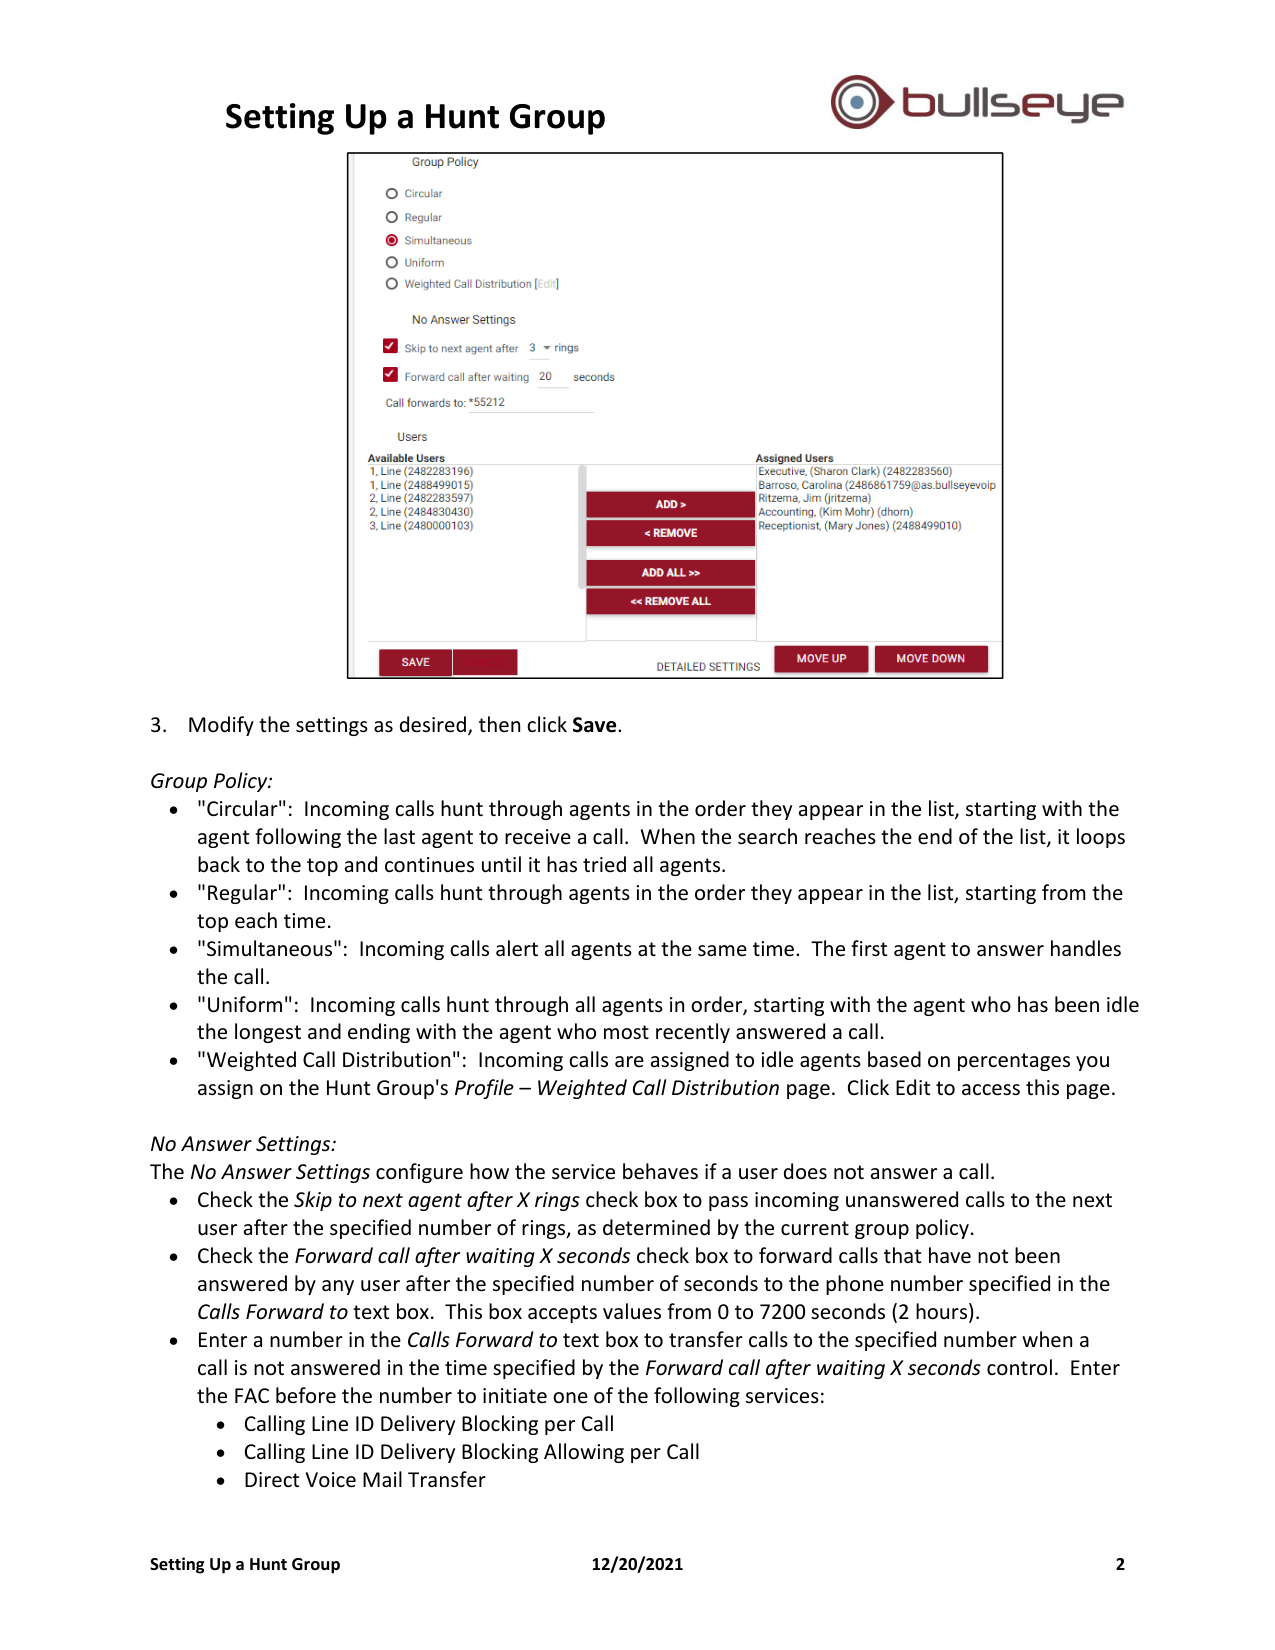
3. Modify the settings as desired, then click Save.
Group Policy:
• "Circular": Incoming calls hunt through agents in the order they appear in the list, starting with the
agent following the last agent to receive a call. When the search reaches the end of the list, it loops
back to the top and continues until it has tried all agents.
• "Regular": Incoming calls hunt through agents in the order they appear in the list, starting from the
top each time.
• "Simultaneous": Incoming calls alert all agents at the same time. The first agent to answer handles
the call.
• "Uniform": Incoming calls hunt through all agents in order, starting with the agent who has been idle
the longest and ending with the agent who most recently answered a call.
• "Weighted Call Distribution": Incoming calls are assigned to idle agents based on percentages you
assign on the Hunt Group's Profile – Weighted Call Distribution page. Click Edit to access this page.
No Answer Settings:
The No Answer Settings configure how the service behaves if a user does not answer a call.
• Check the Skip to next agent after X rings check box to pass incoming unanswered calls to the next
user after the specified number of rings, as determined by the current group policy.
• Check the Forward call after waiting X seconds check box to forward calls that have not been
answered by any user after the specified number of seconds to the phone number specified in the
Calls Forward to text box. This box accepts values from 0 to 7200 seconds (2 hours).
• Enter a number in the Calls Forward to text box to transfer calls to the specified number when a
call is not answered in the time specified by the Forward call after waiting X seconds control. Enter
the FAC before the number to initiate one of the following services:
• Calling Line ID Delivery Blocking per Call
• Calling Line ID Delivery Blocking Allowing per Call
• Direct Voice Mail Transfer
Setting Up a Hunt Group
Setting Up a Hunt Group
12/20/2021
3
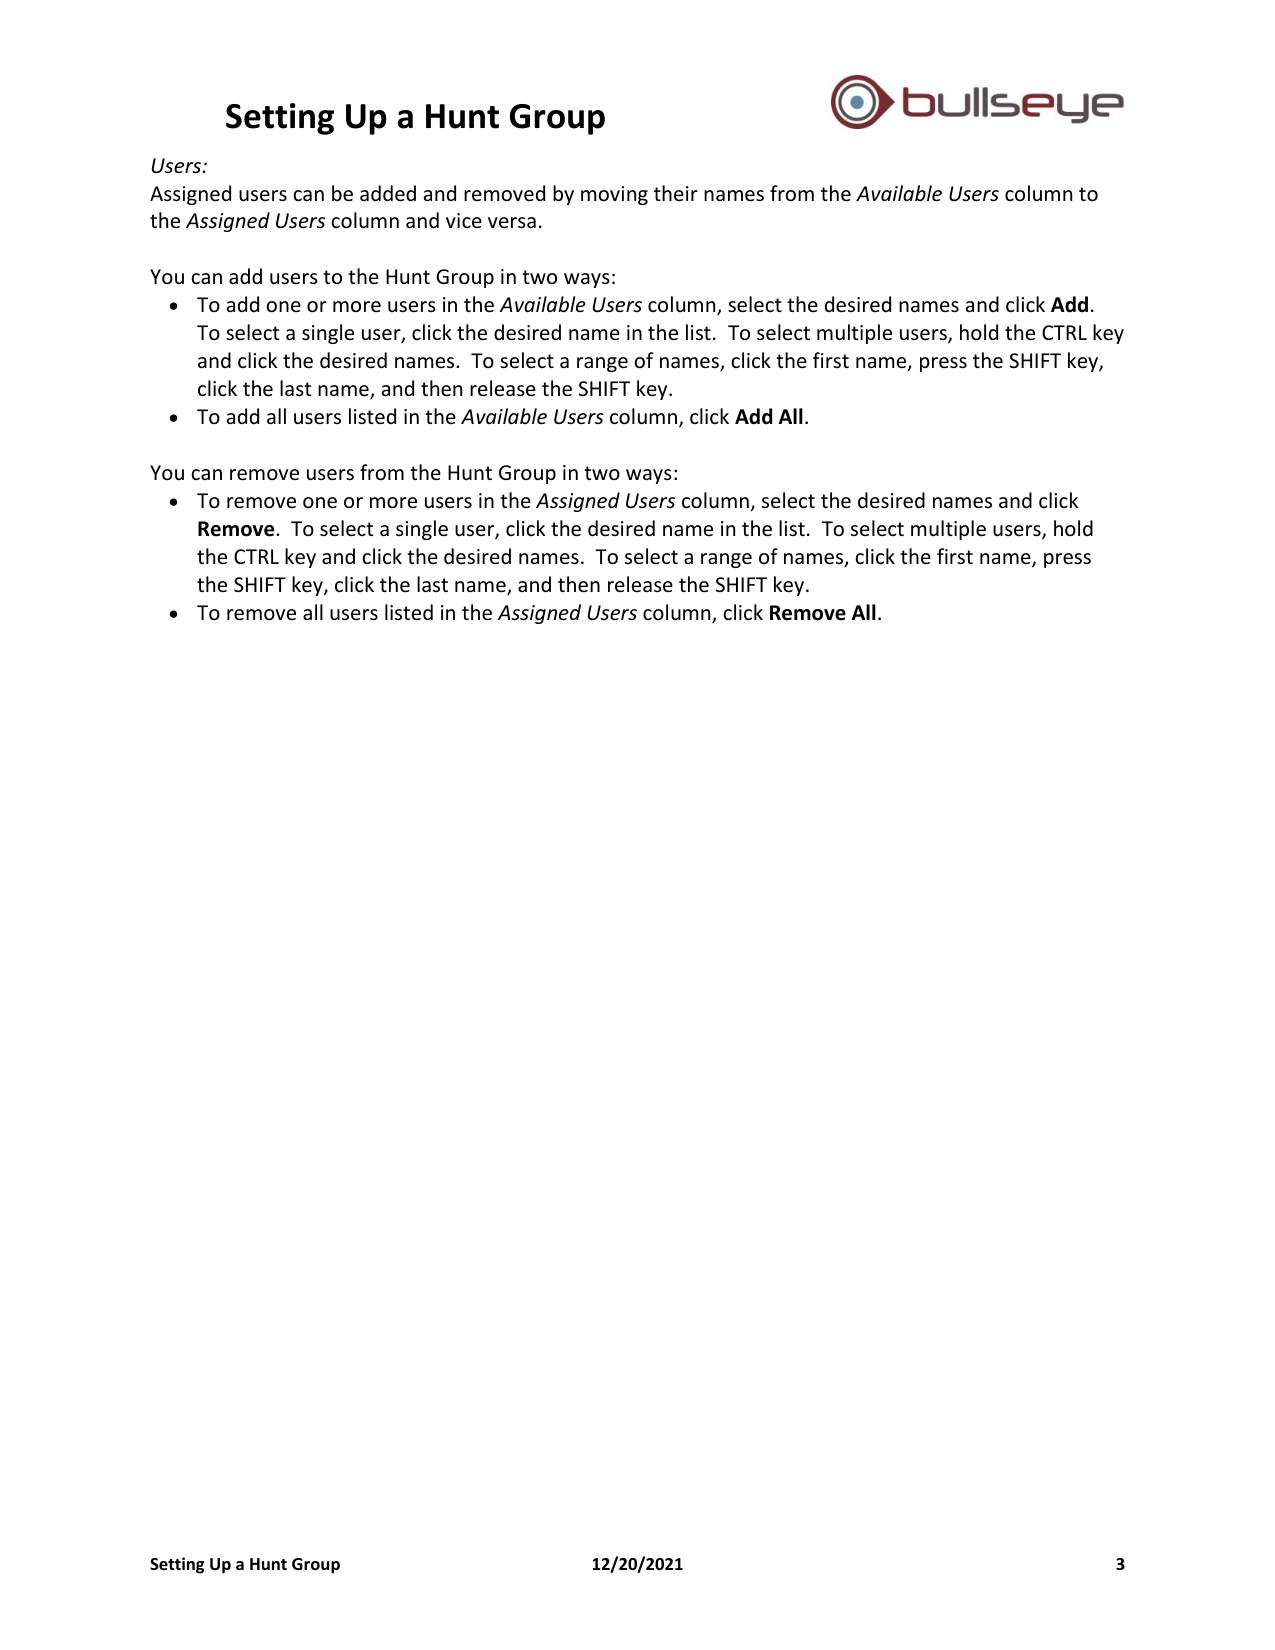
Users:
Assigned users can be added and removed by moving their names from the Available Users column to
the Assigned Users column and vice versa.
You can add users to the Hunt Group in two ways:
• To add one or more users in the Available Users column, select the desired names and click Add.
To select a single user, click the desired name in the list. To select multiple users, hold the CTRL key
and click the desired names. To select a range of names, click the first name, press the SHIFT key,
click the last name, and then release the SHIFT key.
• To add all users listed in the Available Users column, click Add All.
You can remove users from the Hunt Group in two ways:
• To remove one or more users in the Assigned Users column, select the desired names and click
Remove. To select a single user, click the desired name in the list. To select multiple users, hold
the CTRL key and click the desired names. To select a range of names, click the first name, press
the SHIFT key, click the last name, and then release the SHIFT key.
• To remove all users listed in the Assigned Users column, click Remove All.