
How to Set-up your Auto Attendant
Summary: This document explains how to set-up your Auto Attendant. To record & upload a custom greeting also refer to Announcement Repository.
Download article(s)
![]() 05_Auto Attendant User Guide v2 Loki 215M10 (1).pdf
05_Auto Attendant User Guide v2 Loki 215M10 (1).pdf
05_Auto Attendant User Guide v2 Loki 215M10 (1)

Auto Attendant User Guide
Auto Attendant User Guide
12/2/2021
1 of 9
This user guide is everything you need to be able to correctly setup your Auto Attendant. This involves setting
your time schedules, configuring your Auto Attendant, recording and submitting your greetings, and
determining your call routing. The VoIP Portal provides easy access to configure and manage your Auto
Attendant.
Note: For information regarding accessing and navigating the VoIP Portal, please refer to Managing Your
Hosted PBX Services.
Setting Your Time Schedule
Note: Time Schedule is optional and only needed if you wish to have an After Hours menu and greeting
that is separate & different from the Business Hours menu and greeting. If you only require a
business hours greeting, proceed to Setting Up Your Auto Attendant on page 4.
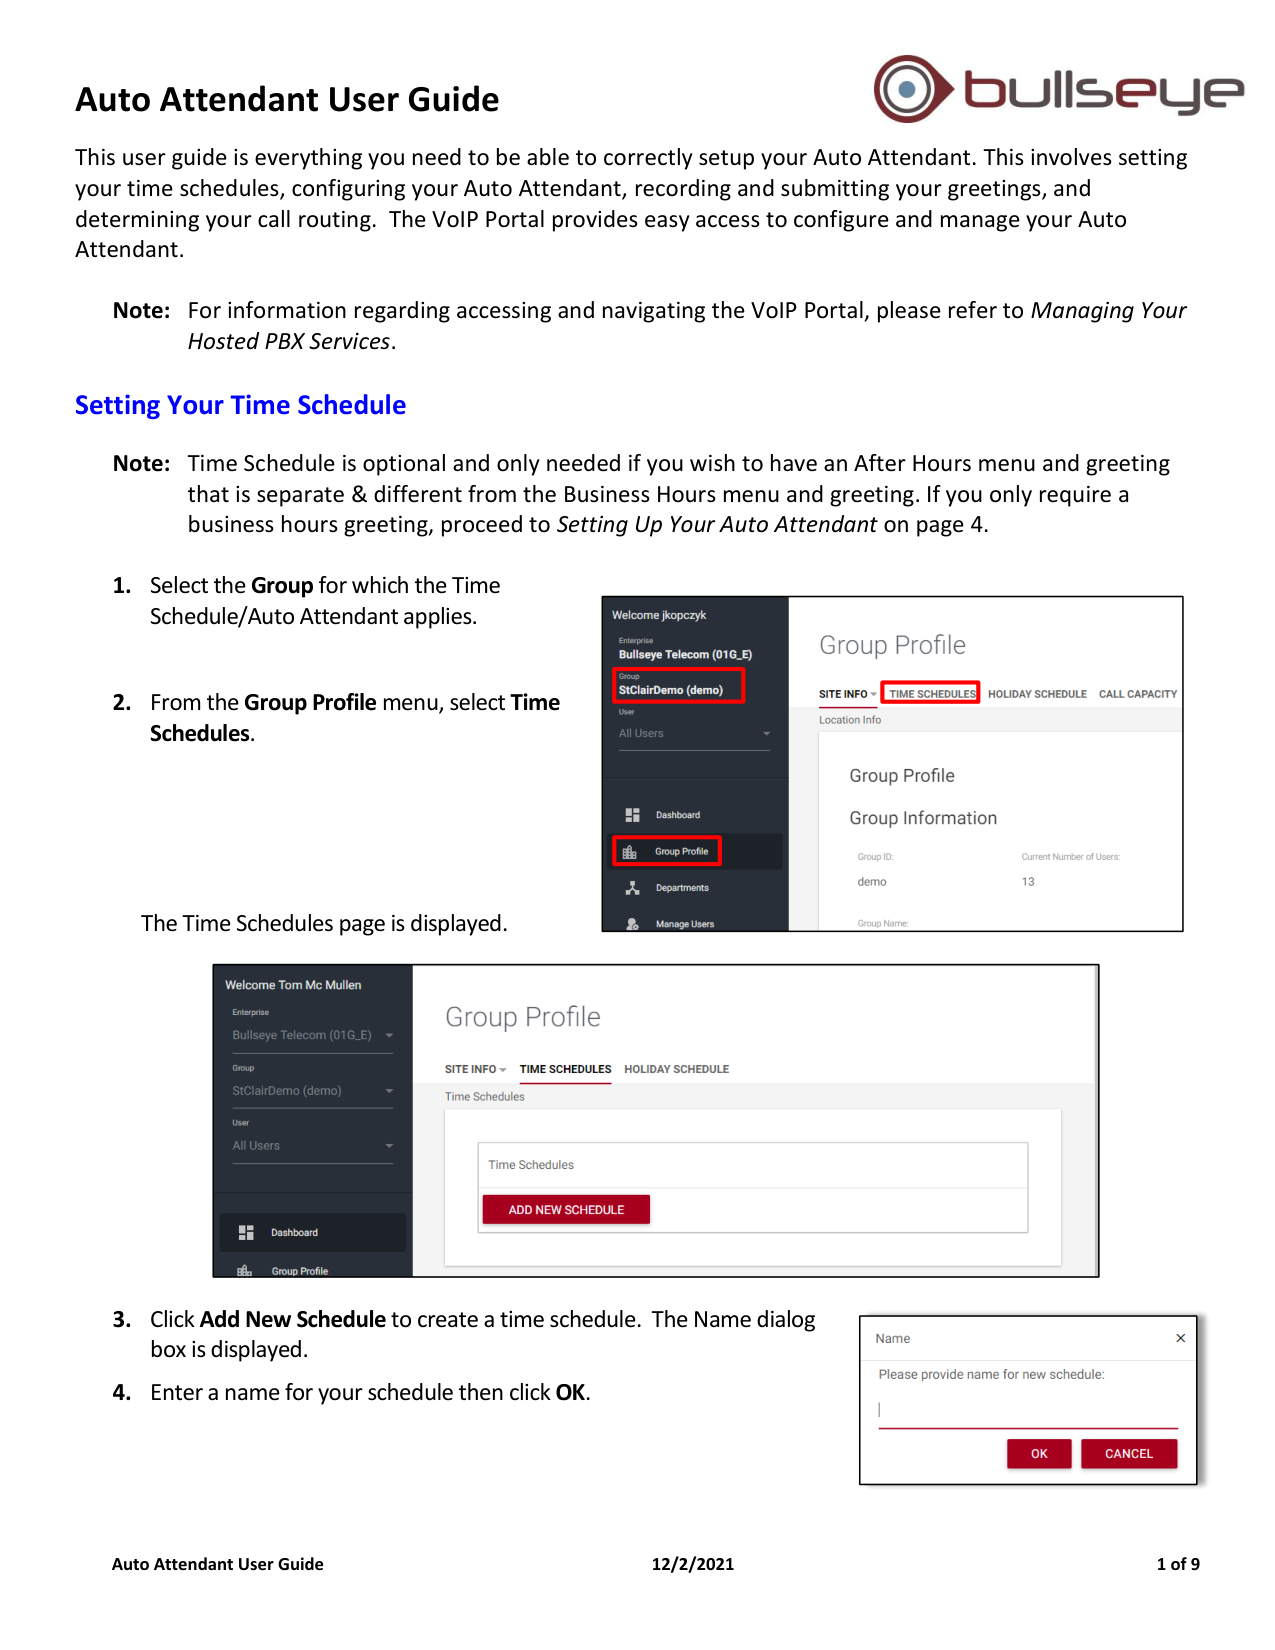
1. Select the Group for which the Time
Schedule/Auto Attendant applies.
2. From the Group Profile menu, select Time
Schedules.
The Time Schedules page is displayed.
3. Click Add New Schedule to create a time schedule. The Name dialog
box is displayed.
4. Enter a name for your schedule then click OK.
Auto Attendant User Guide
Auto Attendant User Guide
12/2/2021
2 of 9
5. Hover over the starting time for the first day of your schedule, then click and drag to the right to the end
time. When you release the mouse, the block of time will be applied to the selected day.
NOTE: Any hours or days of the week not defined here will be treated by the After Hours greeting and
routing options.
6. To edit a block of time, click on the time range, adjust the
Start and End time as needed and then click Submit.
7. To delete a block of time, right-click on the time range and
click the Delete event checkbox.
8. To rename a schedule, click Rename, then
repeat step 4.
9. To delete a schedule, click Delete, then click Yes.
10. To save any changes to the schedule, click Save.
Auto Attendant User Guide
Auto Attendant User Guide
12/2/2021
3 of 9
Setting Your Holiday Schedule
Note: Holiday Schedule is optional and only needed if you wish to have an alternate greeting and options
for your auto attendant for specific holidays. If you only require a business hours greeting, proceed
to Setting Up Your Auto Attendant on page 4.
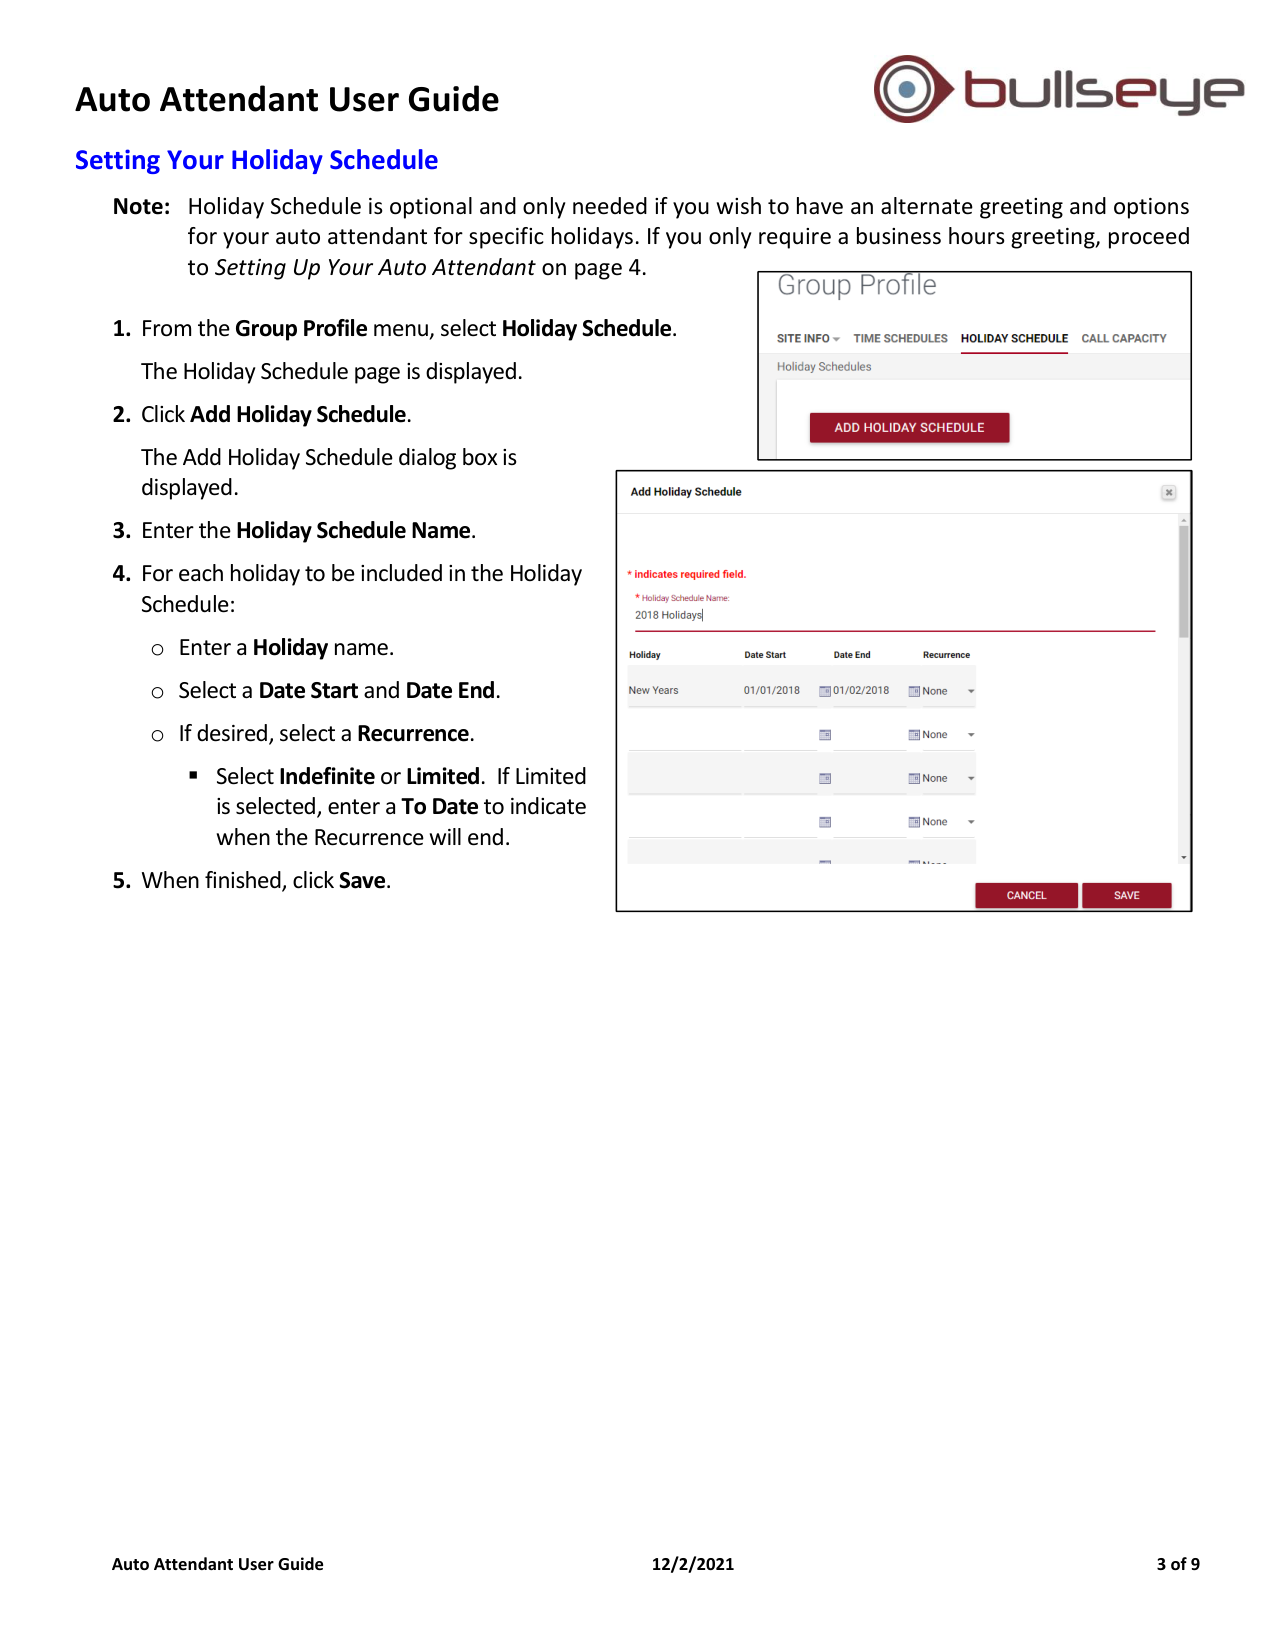
1. From the Group Profile menu, select Holiday Schedule.
The Holiday Schedule page is displayed.
2. Click Add Holiday Schedule.
The Add Holiday Schedule dialog box is
displayed.
3. Enter the Holiday Schedule Name.
4. For each holiday to be included in the Holiday
Schedule:
o Enter a Holiday name.
o Select a Date Start and Date End.
o If desired, select a Recurrence.
▪ Select Indefinite or Limited. If Limited
is selected, enter a To Date to indicate
when the Recurrence will end.
5. When finished, click Save.
Auto Attendant User Guide
Auto Attendant User Guide
12/2/2021
4 of 9
Setting Up Your Auto Attendant
Setting up your Auto Attendant consists of 3 primary steps:
1. Configure your Auto Attendant, including:
o If applicable, assign the schedules you created
o Establish where incoming calls are routed
2. Record custom greetings
3. Assign the custom greeting to the Auto Attendant
Step 1: Configure Your Auto Attendant
To do this, follow the steps on the next few pages.
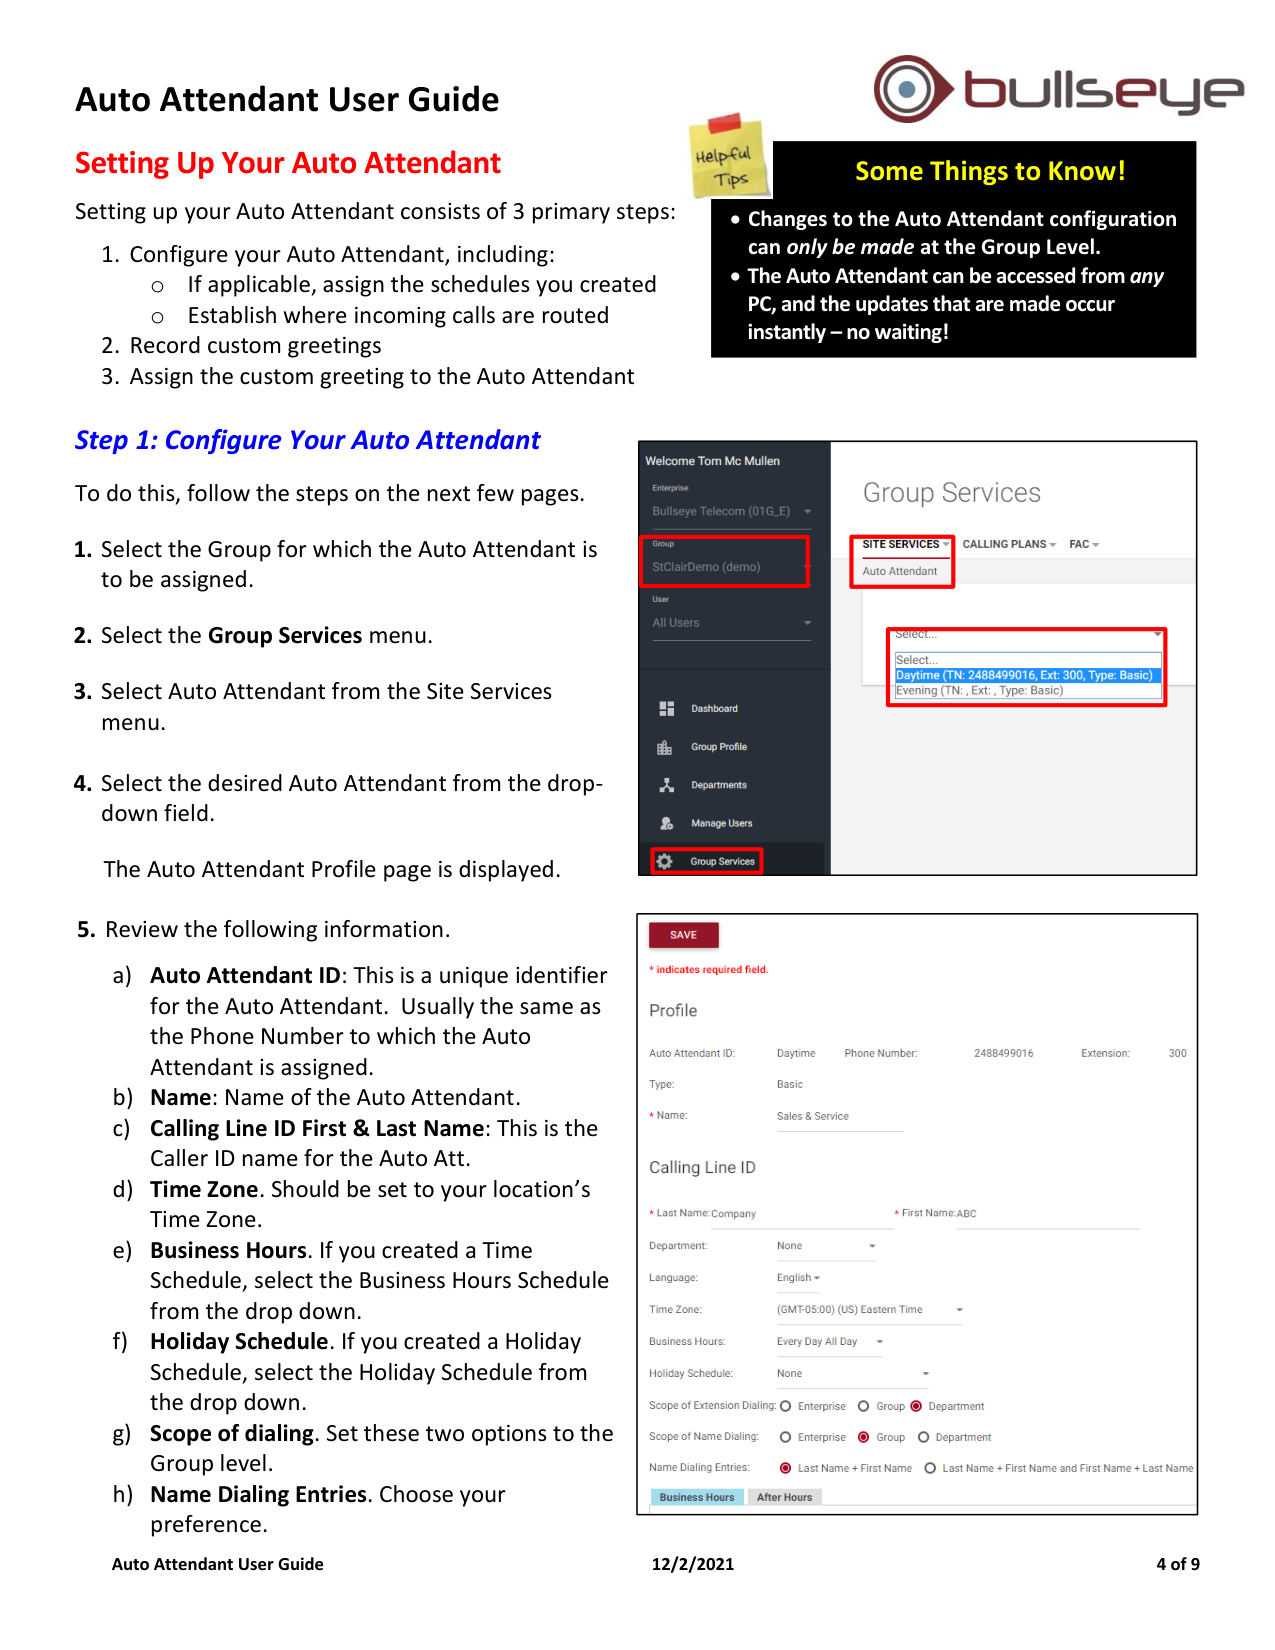
1. Select the Group for which the Auto Attendant is
to be assigned.
2. Select the Group Services menu.
3. Select Auto Attendant from the Site Services
menu.
4. Select the desired Auto Attendant from the drop-
down field.
The Auto Attendant Profile page is displayed.
5. Review the following information.
a) Auto Attendant ID: This is a unique identifier
for the Auto Attendant. Usually the same as
the Phone Number to which the Auto
Attendant is assigned.
b) Name: Name of the Auto Attendant.
c) Calling Line ID First & Last Name: This is the
Caller ID name for the Auto Att.
d) Time Zone. Should be set to your location’s
Time Zone.
e) Business Hours. If you created a Time
Schedule, select the Business Hours Schedule
from the drop down.
f) Holiday Schedule. If you created a Holiday
Schedule, select the Holiday Schedule from
the drop down.
g) Scope of dialing. Set these two options to the
Group level.
h) Name Dialing Entries. Choose your
preference.
Some Things to Know!
• Changes to the Auto Attendant configuration
can only be made at the Group Level.
• The Auto Attendant can be accessed from any
PC, and the updates that are made occur
instantly – no waiting!
Auto Attendant User Guide
Auto Attendant User Guide
12/2/2021
5 of 9
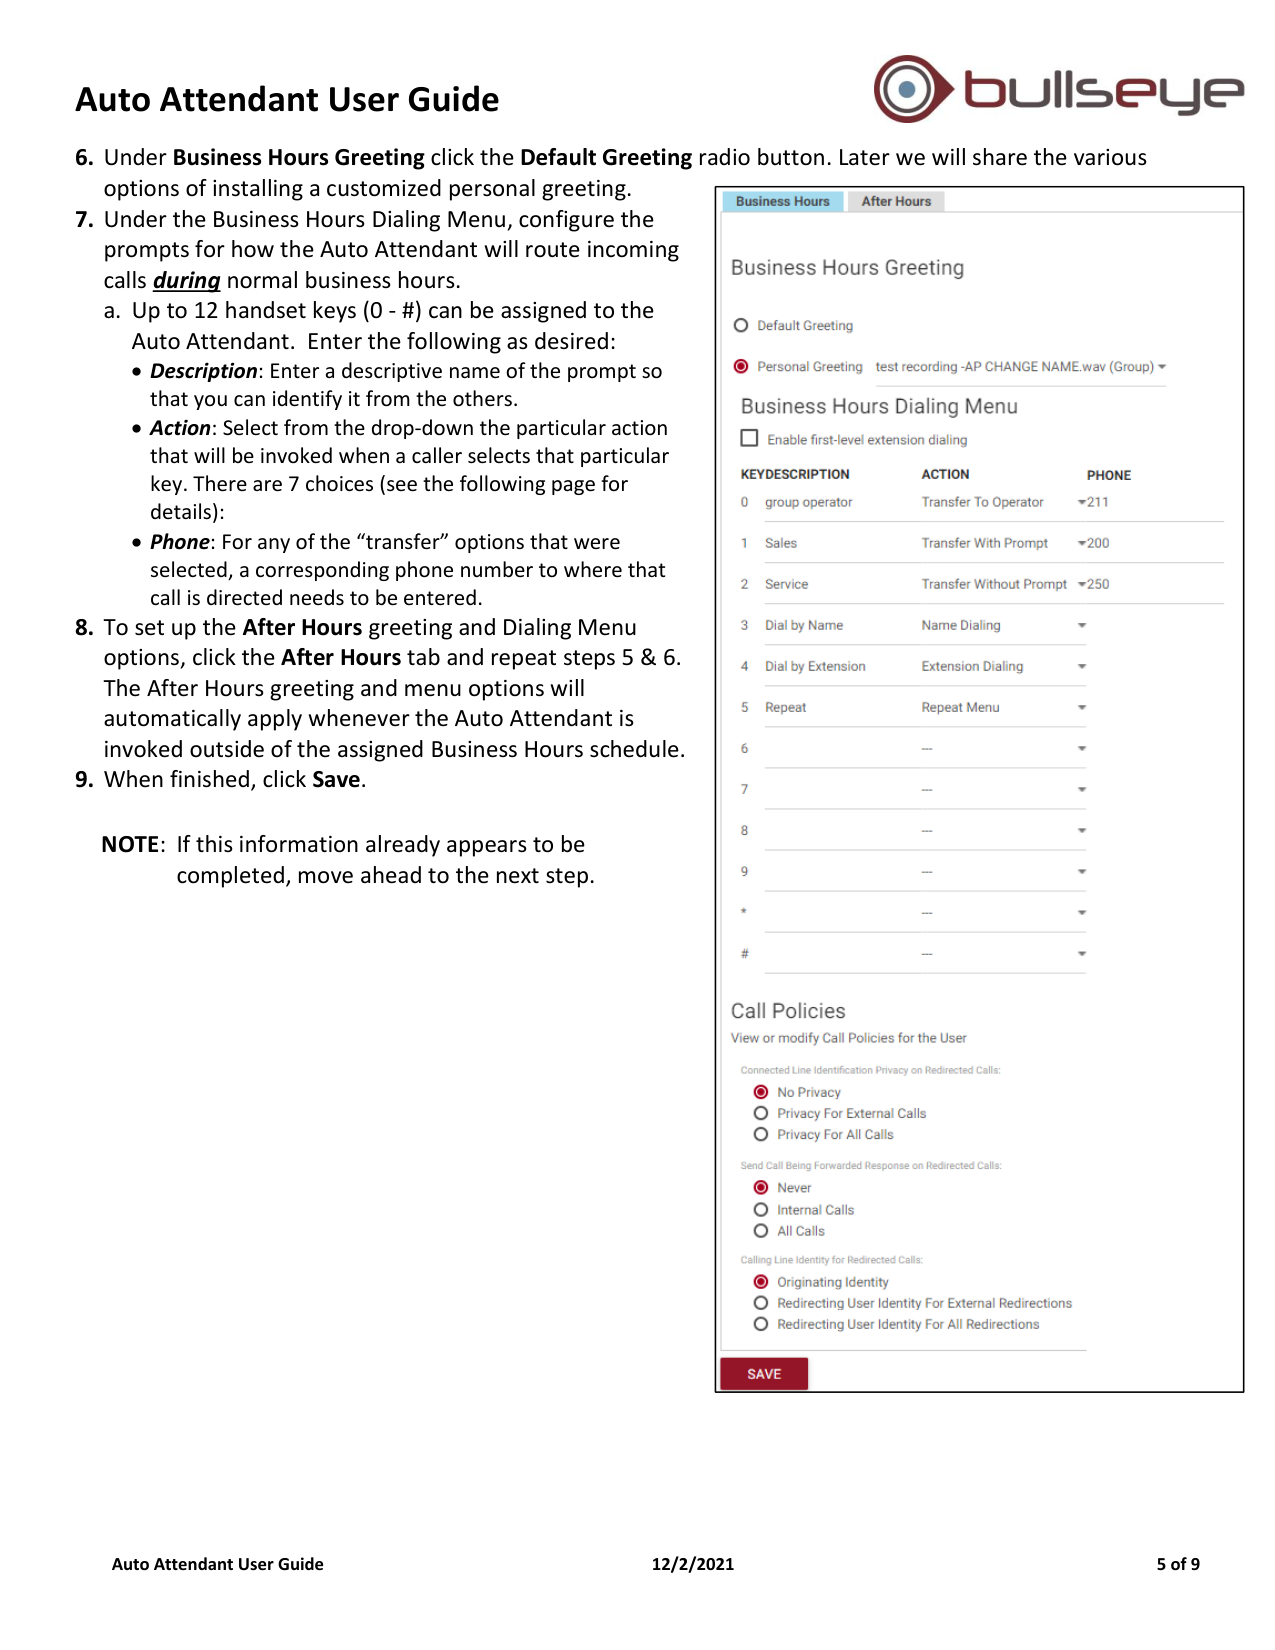
6. Under Business Hours Greeting click the Default Greeting radio button. Later we will share the various
options of installing a customized personal greeting.
7. Under the Business Hours Dialing Menu, configure the
prompts for how the Auto Attendant will route incoming
calls during normal business hours.
a. Up to 12 handset keys (0 - #) can be assigned to the
Auto Attendant. Enter the following as desired:
• Description: Enter a descriptive name of the prompt so
that you can identify it from the others.
• Action: Select from the drop-down the particular action
that will be invoked when a caller selects that particular
key. There are 7 choices (see the following page for
details):
• Phone: For any of the “transfer” options that were
selected, a corresponding phone number to where that
call is directed needs to be entered.
8. To set up the After Hours greeting and Dialing Menu
options, click the After Hours tab and repeat steps 5 & 6.
The After Hours greeting and menu options will
automatically apply whenever the Auto Attendant is
invoked outside of the assigned Business Hours schedule.
9. When finished, click Save.
NOTE: If this information already appears to be
completed, move ahead to the next step.
Auto Attendant User Guide
Auto Attendant User Guide
12/2/2021
6 of 9
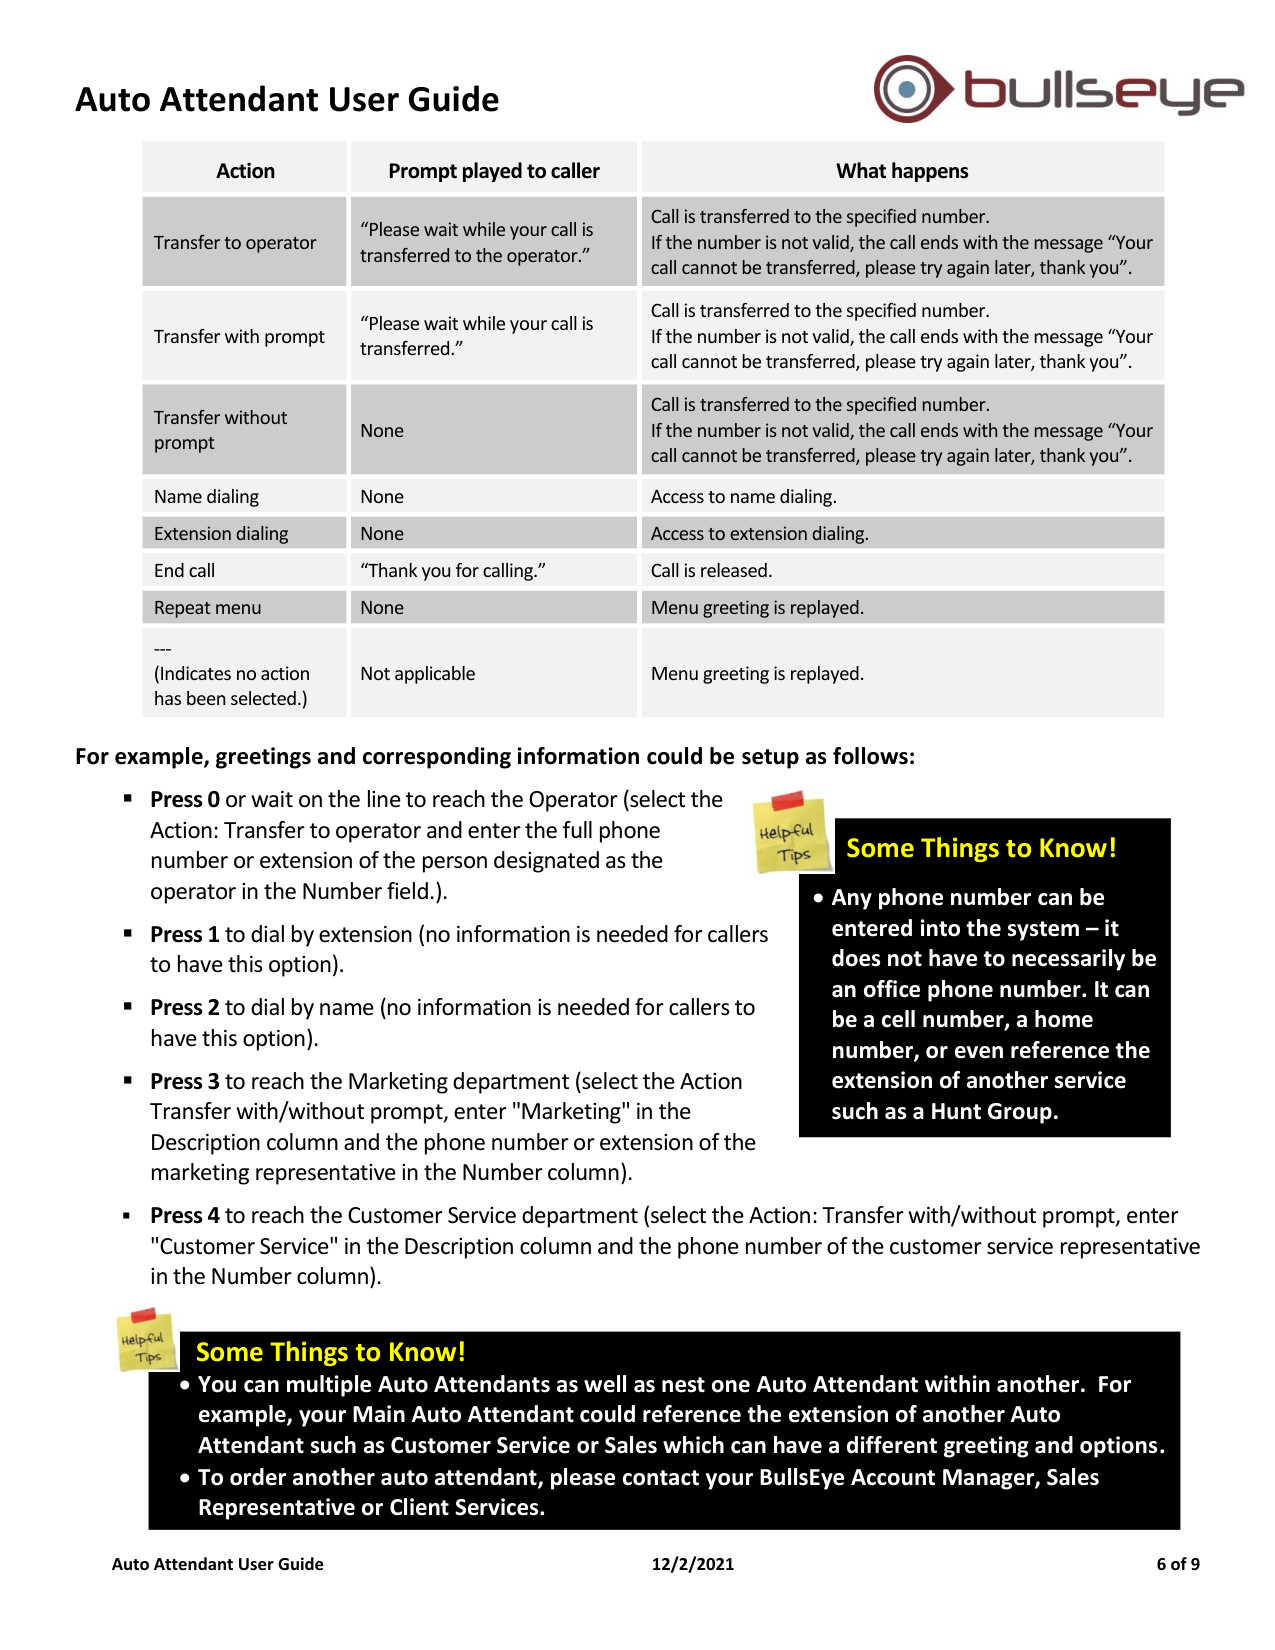
Action
Prompt played to caller
What happens
Transfer to operator
“Please wait while your call is
transferred to the operator.”
Call is transferred to the specified number.
If the number is not valid, the call ends with the message “Your
call cannot be transferred, please try again later, thank you”.
Transfer with prompt
“Please wait while your call is
transferred.”
Call is transferred to the specified number.
If the number is not valid, the call ends with the message “Your
call cannot be transferred, please try again later, thank you”.
Transfer without
prompt
None
Call is transferred to the specified number.
If the number is not valid, the call ends with the message “Your
call cannot be transferred, please try again later, thank you”.
Name dialing
None
Access to name dialing.
Extension dialing
None
Access to extension dialing.
End call
“Thank you for calling.”
Call is released.
Repeat menu
None
Menu greeting is replayed.
---
(Indicates no action
has been selected.)
Not applicable
Menu greeting is replayed.
For example, greetings and corresponding information could be setup as follows:
▪ Press 0 or wait on the line to reach the Operator (select the
Action: Transfer to operator and enter the full phone
number or extension of the person designated as the
operator in the Number field.).
▪ Press 1 to dial by extension (no information is needed for callers
to have this option).
▪ Press 2 to dial by name (no information is needed for callers to
have this option).
▪ Press 3 to reach the Marketing department (select the Action
Transfer with/without prompt, enter "Marketing" in the
Description column and the phone number or extension of the
marketing representative in the Number column).
▪ Press 4 to reach the Customer Service department (select the Action: Transfer with/without prompt, enter
"Customer Service" in the Description column and the phone number of the customer service representative
in the Number column).
Some Things to Know!
• You can multiple Auto Attendants as well as nest one Auto Attendant within another. For
example, your Main Auto Attendant could reference the extension of another Auto
Attendant such as Customer Service or Sales which can have a different greeting and options.
• To order another auto attendant, please contact your BullsEye Account Manager, Sales
Representative or Client Services.
Some Things to Know!
Any phone number can be
entered into the system – it
does not have to necessarily be
an office phone number. It can
be a cell number, a home
number, or even reference the
extension of another service
such as a Hunt Group.
Auto Attendant User Guide
Auto Attendant User Guide
12/2/2021
7 of 9
Step 2: Recording Your Custom Greeting
There are two primary ways to record and assign greetings to your Auto Attendant:
•
From a phone within the group: See below.
•
From the Announcement Repository. Once recorded, greetings are uploaded to the Announcement Repository
so that they can be selected and assigned to the Auto Attendant as well as other services within the VoIP Portal.
For more information on recording greetings and uploading the greetings to the Announcement Repository,
please refer to the Announcement Repository Quick Guide.
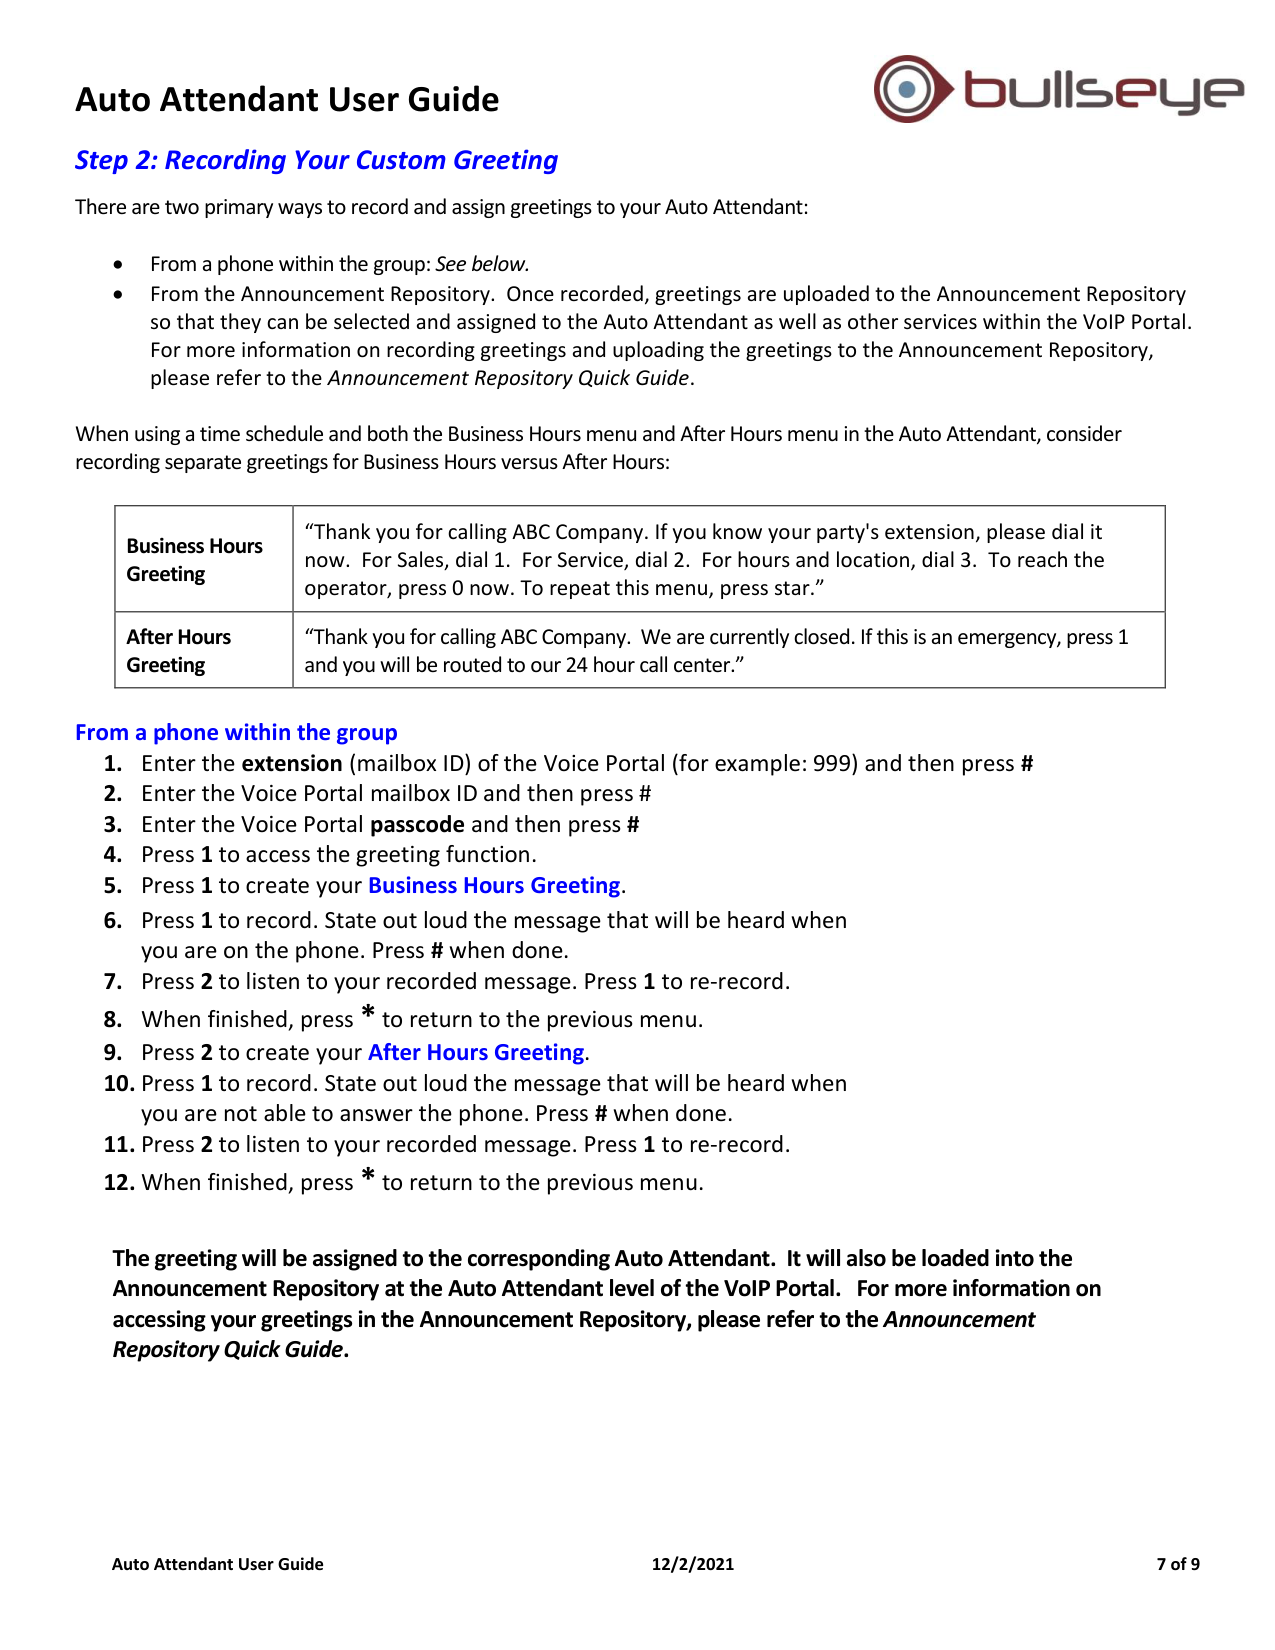
When using a time schedule and both the Business Hours menu and After Hours menu in the Auto Attendant, consider
recording separate greetings for Business Hours versus After Hours:
Business Hours
Greeting
“Thank you for calling ABC Company. If you know your party's extension, please dial it
now. For Sales, dial 1. For Service, dial 2. For hours and location, dial 3. To reach the
operator, press 0 now. To repeat this menu, press star.”
After Hours
Greeting
“Thank you for calling ABC Company. We are currently closed. If this is an emergency, press 1
and you will be routed to our 24 hour call center.”
From a phone within the group
1. Enter the extension (mailbox ID) of the Voice Portal (for example: 999) and then press #
2. Enter the Voice Portal mailbox ID and then press #
3. Enter the Voice Portal passcode and then press #
4. Press 1 to access the greeting function.
5. Press 1 to create your Business Hours Greeting.
6. Press 1 to record. State out loud the message that will be heard when
you are on the phone. Press # when done.
7. Press 2 to listen to your recorded message. Press 1 to re-record.
8. When finished, press * to return to the previous menu.
9. Press 2 to create your After Hours Greeting.
10. Press 1 to record. State out loud the message that will be heard when
you are not able to answer the phone. Press # when done.
11. Press 2 to listen to your recorded message. Press 1 to re-record.
12. When finished, press * to return to the previous menu.
The greeting will be assigned to the corresponding Auto Attendant. It will also be loaded into the
Announcement Repository at the Auto Attendant level of the VoIP Portal. For more information on
accessing your greetings in the Announcement Repository, please refer to the Announcement
Repository Quick Guide.
Auto Attendant User Guide
Auto Attendant User Guide
12/2/2021
8 of 9
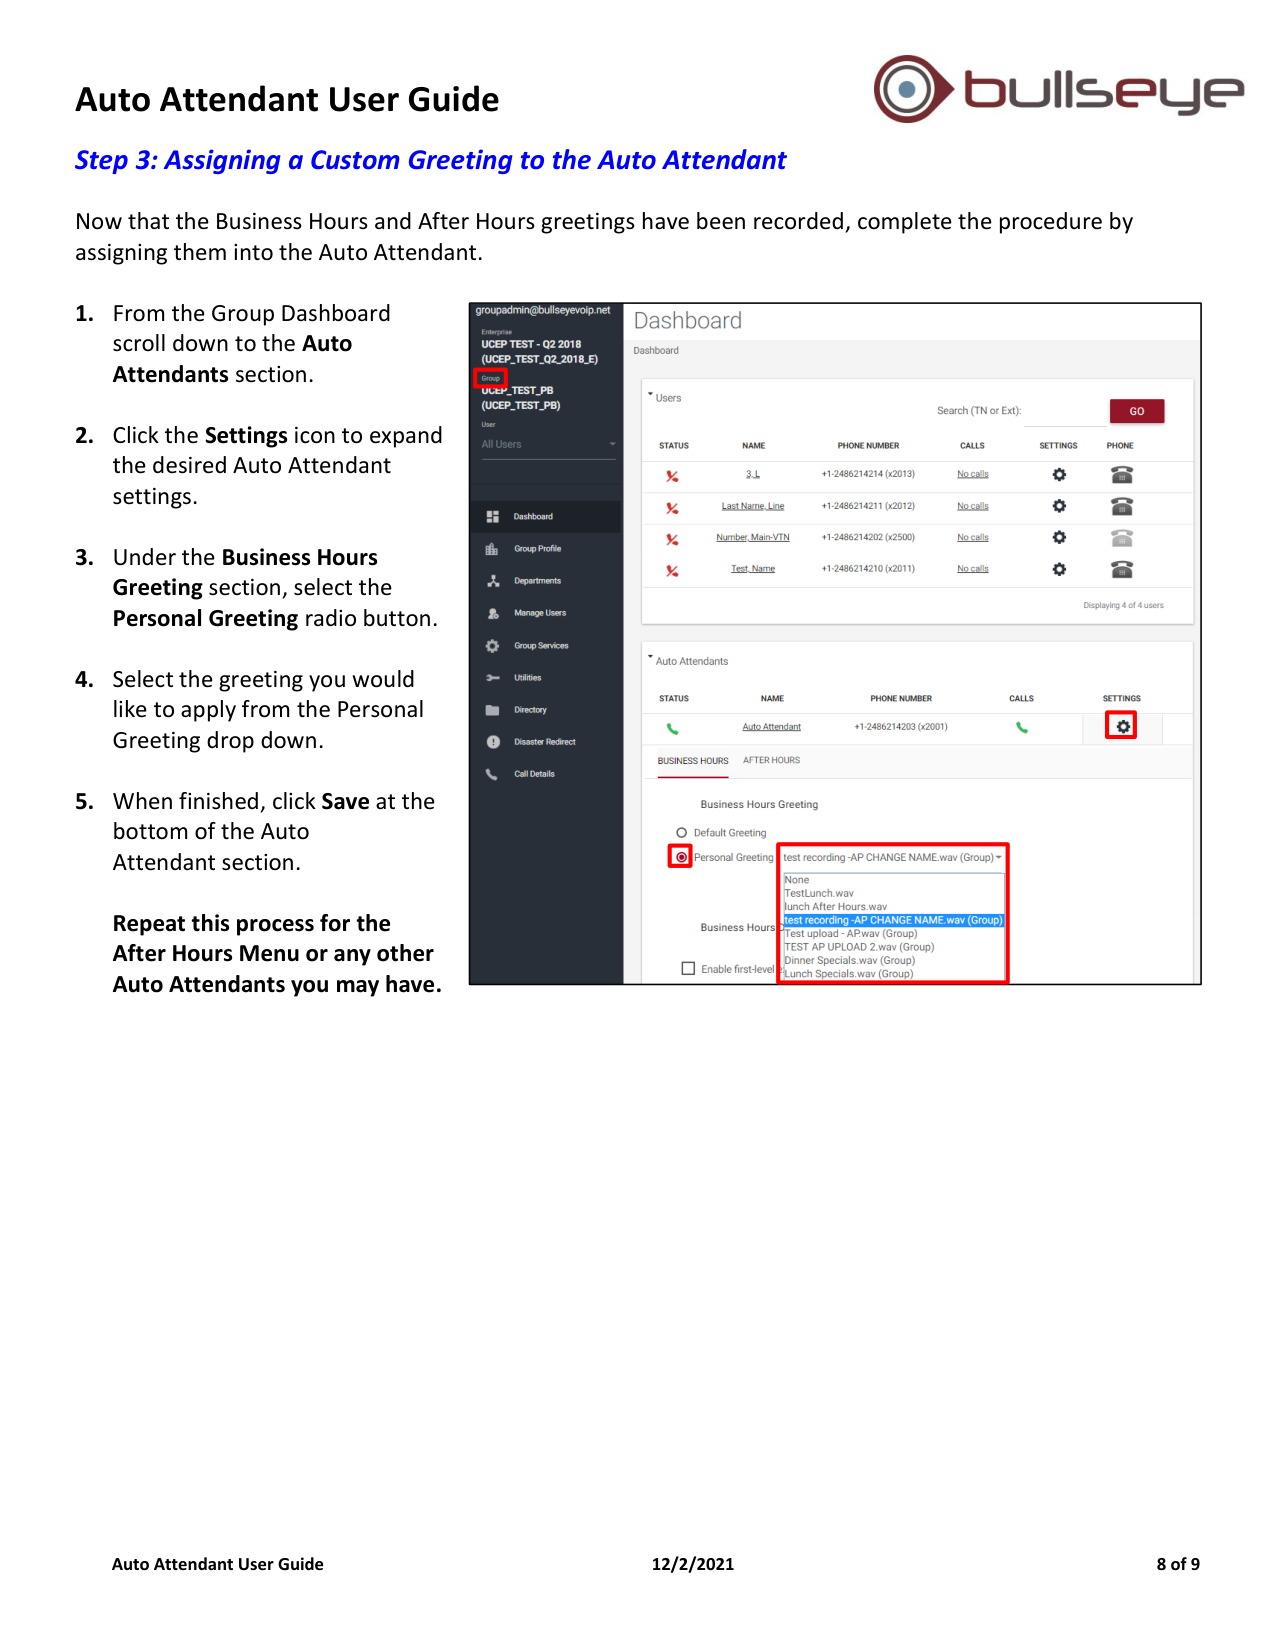
Step 3: Assigning a Custom Greeting to the Auto Attendant
Now that the Business Hours and After Hours greetings have been recorded, complete the procedure by
assigning them into the Auto Attendant.
1. From the Group Dashboard
scroll down to the Auto
Attendants section.
2. Click the Settings icon to expand
the desired Auto Attendant
settings.
3. Under the Business Hours
Greeting section, select the
Personal Greeting radio button.
4. Select the greeting you would
like to apply from the Personal
Greeting drop down.
5. When finished, click Save at the
bottom of the Auto
Attendant section.
Repeat this process for the
After Hours Menu or any other
Auto Attendants you may have.
Auto Attendant User Guide
Auto Attendant User Guide
12/2/2021
9 of 9
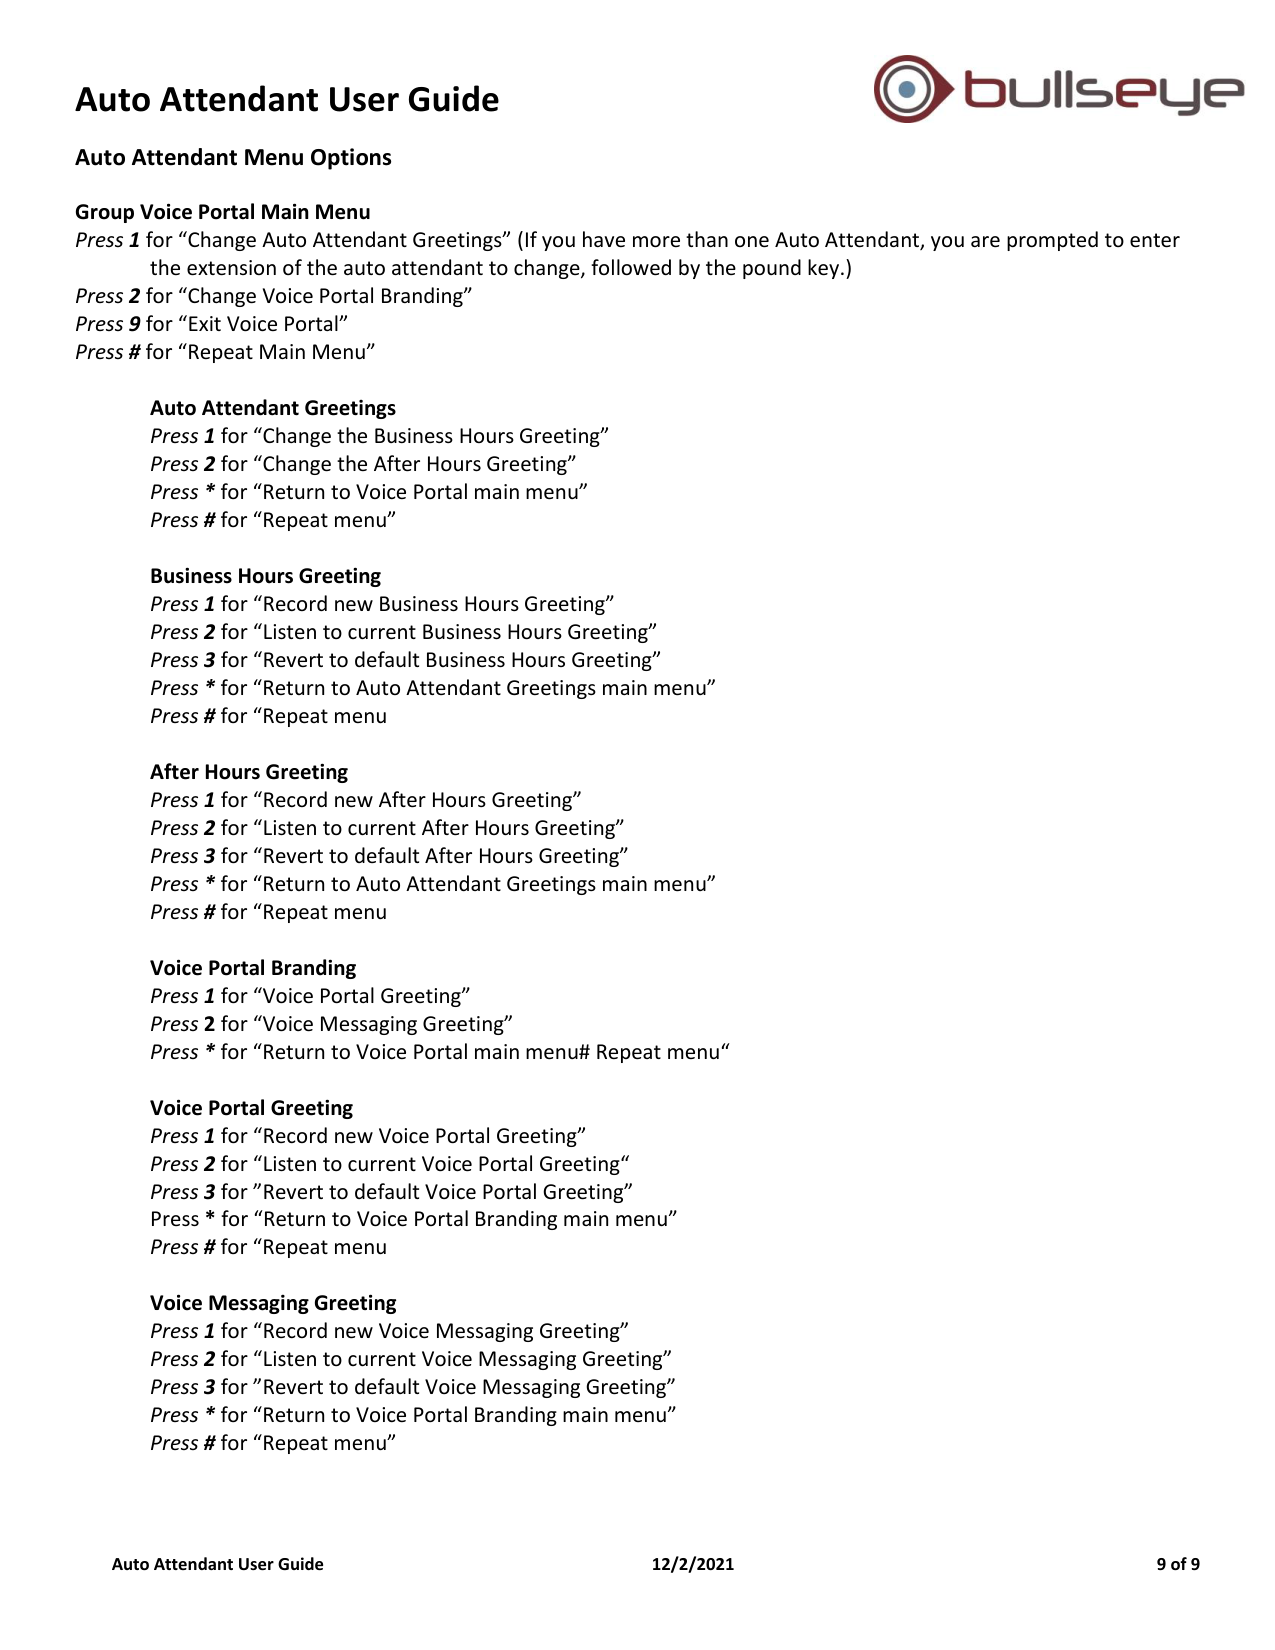
Auto Attendant Menu Options
Group Voice Portal Main Menu
Press 1 for “Change Auto Attendant Greetings” (If you have more than one Auto Attendant, you are prompted to enter
the extension of the auto attendant to change, followed by the pound key.)
Press 2 for “Change Voice Portal Branding”
Press 9 for “Exit Voice Portal”
Press # for “Repeat Main Menu”
Auto Attendant Greetings
Press 1 for “Change the Business Hours Greeting”
Press 2 for “Change the After Hours Greeting”
Press * for “Return to Voice Portal main menu”
Press # for “Repeat menu”
Business Hours Greeting
Press 1 for “Record new Business Hours Greeting”
Press 2 for “Listen to current Business Hours Greeting”
Press 3 for “Revert to default Business Hours Greeting”
Press * for “Return to Auto Attendant Greetings main menu”
Press # for “Repeat menu
After Hours Greeting
Press 1 for “Record new After Hours Greeting”
Press 2 for “Listen to current After Hours Greeting”
Press 3 for “Revert to default After Hours Greeting”
Press * for “Return to Auto Attendant Greetings main menu”
Press # for “Repeat menu
Voice Portal Branding
Press 1 for “Voice Portal Greeting”
Press 2 for “Voice Messaging Greeting”
Press * for “Return to Voice Portal main menu# Repeat menu“
Voice Portal Greeting
Press 1 for “Record new Voice Portal Greeting”
Press 2 for “Listen to current Voice Portal Greeting“
Press 3 for ”Revert to default Voice Portal Greeting”
Press * for “Return to Voice Portal Branding main menu”
Press # for “Repeat menu
Voice Messaging Greeting
Press 1 for “Record new Voice Messaging Greeting”
Press 2 for “Listen to current Voice Messaging Greeting”
Press 3 for ”Revert to default Voice Messaging Greeting”
Press * for “Return to Voice Portal Branding main menu”
Press # for “Repeat menu”